
DIY Bumper Plate Storage Rack
So you’ve got your home gym started, maybe even built yourself a nice platform to lift on, but what about all those bumper plates you just bought? Unless you found a used plate tree for a really good price, you likely don’t want to shell out the dough for a non-essential piece of equipment like that when building a home gym. Not to mention that plate trees don’t work well for bumper plates. You want your fancy home gym to be the envy of fellow lifters. A personal haven for iron destruction and physical construction. Most bumper plates are usually stored in a horizontal rack that lays somewhere near the platform for easy access as you slap more and more weight on the bar. But it’s rare to find these bumper plate racks used and they are normally made of metal and expensive to buy new. If you're going to wait around until a used one pops up on your local Craigslist, you could be waiting a long time.
What should you do, you ask?
Part of the joy of having a home gym is the pride of building your own equipment.
What Would MacGuyver Do?
Build your own horizontal bumper plate storage, of course.
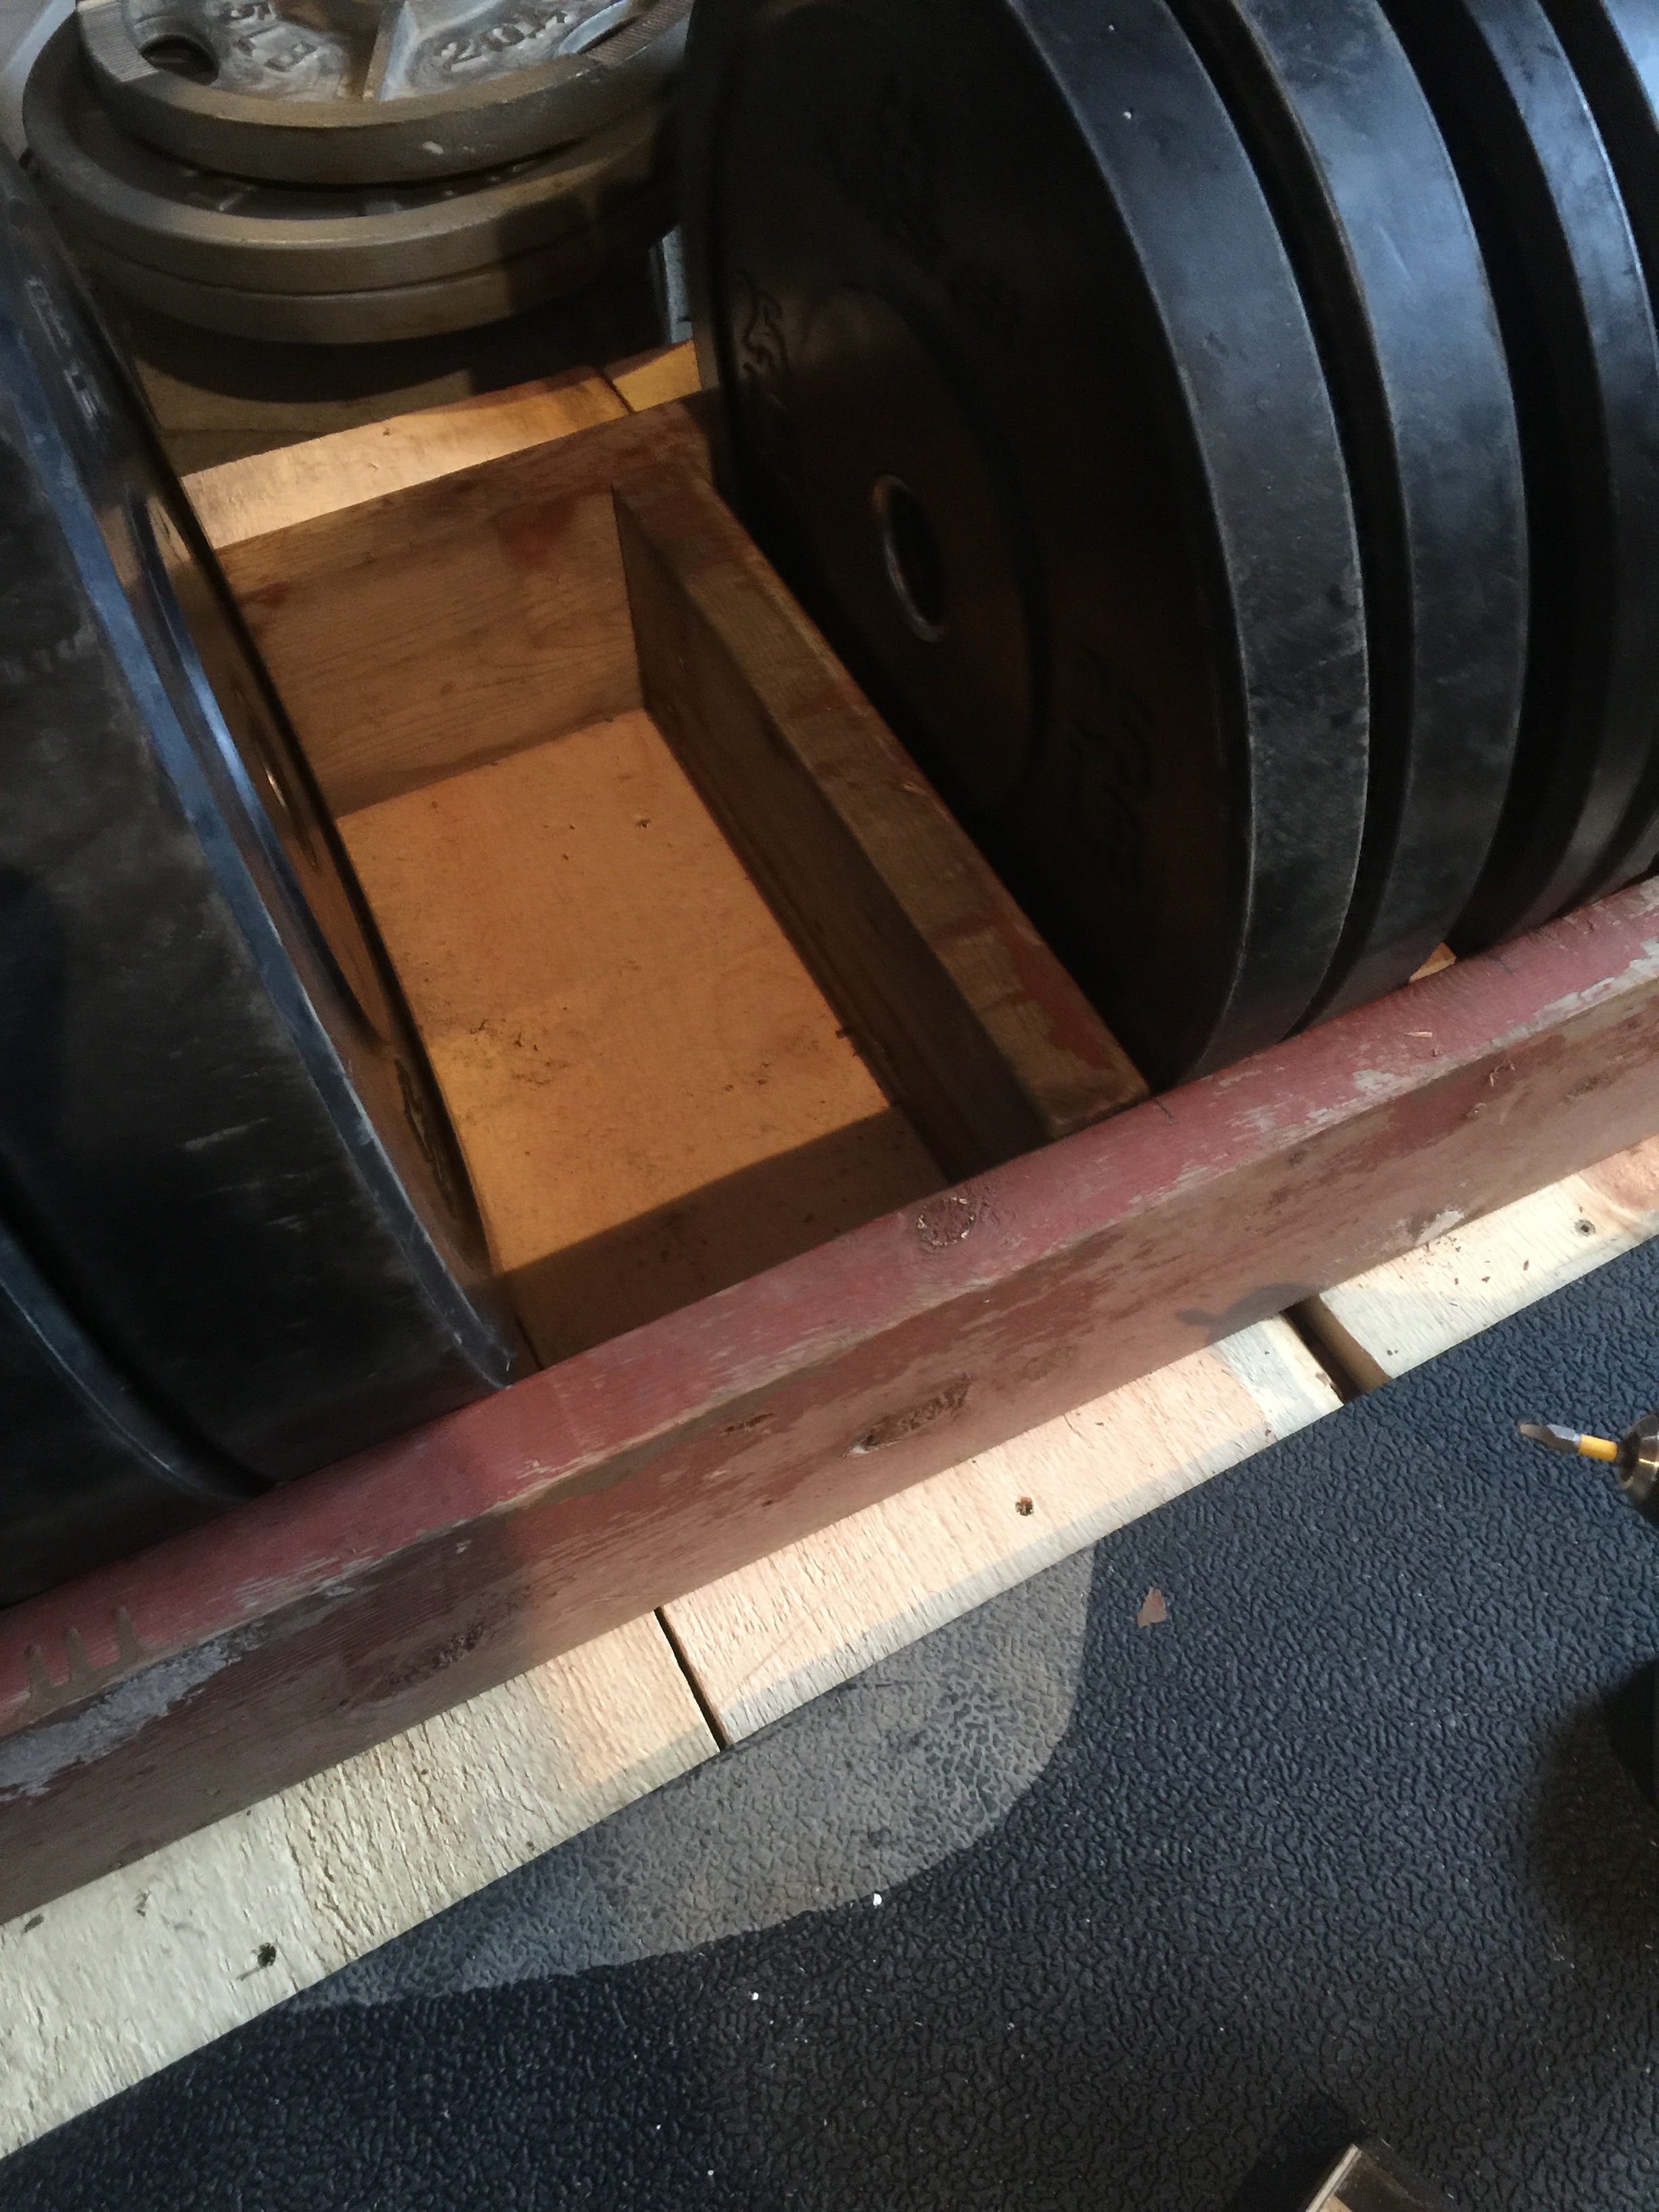
This was the easiest thing that I built for my home gym and I didn’t even need to go and buy new wood from the hardware store for it. Unless you’re looking for the perfect #homegym Instagram shot, you can smash together some old boards and have a perfectly functional storage system in no time. I’m more about making my gym work for me than having it look perfectly pleasing. My plate rack still looks like a homemade project, but it’s holding together just as good now as it was when I built it 8 months ago and I expect to get many years out of it. Even if you are building yours from whatever wood you have at home, you can still sand it down and paint it to spruce it up however you like.
I get that Olympic lifters are more perfectionist, but for strongman, we rarely care about how equipment looks as long as it is heavy and stays together (most of the time). Carrying this thinking over to the gym accessories, all I really need is for my storage rack to hold together. If it doesn't look all shiny and new it's no big deal.
So now, let’s build it.
Building supplies will depend on how many bumper plates you have or how many you hope to expand your collection into. Use this guide as a general overview based on what I built.
What you’ll need:
* 8-9 feet of 2”x6” boards with at least 2 good pieces 36” in length.
* Plenty of 3" or 4” screws - decking screws work great.
* Cordless Drill
* Mitre saw or another saw of choice for cutting your wood.
* Tape Measure
Here’s How to Do It:
1. Begin by determining how much total length you’ll need. A different kind of plate math from normal. Add together the thickness of all the plates you’re building the rack for and remember to include the spacer pieces you’ll be using. Using a tape measure you can either line up all the plates and measure the total length or measure the thickness of the individual plates and add it all together. Add to this the total space you'll need for the spacers between each grouping of plates. I determined that the length of the side rails I would need was about 36”.

2. Cut the two side rails and determine how high you want your plates to sit in the bumper plate box. I found that 14” for the width of the end supports was perfect so that the bumpers were easy to remove and yet not so elevated in the rack that they were wobbly and prone to toppling.
3. With the side rails and end pieces aligned and on a flat surface, screw the frame together. Use at least 2 or 3 screws in each corner to ensure the frame is sturdy and won't twist.

4. Cut the internal pieces that you’ll need to space the plates as desired. I grouped the different weights together, so all of the 45s fit together, 35s, 25s, 15s, and 10s. I used 2”x6”s cut to match the internal width of the box for the heavier plates, but found that the gap between the plates was excessive for the 10s and 15s so used some scraps of 1” thick wood for those spacers.
5. Begin to screw the spacers in place. Test the rack with the plates in place for each section as you go along to make sure you’ve left just enough room for it to be easy to remove the plates. You should be able to get your fingers between the plates. While not as much of a problem for the lighter plates, you want to leave enough space between the 45s to be able to lift them out. If the plates are jammed snugly into place it will be difficult and frustrating to remove them.
6. Test out the finished product and reinforce with more screws if needed.
7. Share a black and white photo of your finished product on Instagram with #homegymlyfe and bask in the glory of being the envy of all your fellow lifters.

Fortissimus
Be better prepared for your next competition with this performance and prep guide to the week before a strongman competition.

Get The Free Guide Here