
How To Make An Olympic Weightlifting Platform
Today I’m excited to share with you how I made my weightlifting platform in my garage. When researching how I would construct this I learned that there are quite a few ways to design a weightlifting platform all unique to your particular needs.

To preface, I would like to explain my particular needs for this platform and who else would benefit from a similar design.
This platform was being built for a garage gym with a cracked and uneven concrete floor that also has a tendency to flood during the snow-melt in the spring or heavy rainfalls. Therefore, I needed to design an elevated box-style platform instead of a simple plywood platform like the one I had initially thought I’d be building. I might have been able to get away with an easier design if I had chosen to do a smaller surface area like 4’x8’ used just for deadlifts and squats, but because the floor in the garage is so uneven, I knew that almost all of my lifting in the garage would have to be done on the platform and I would therefore need a larger surface. It turns out plywood would also have been a bad choice, because the humidity and potential flooding in the garage would have caused problems like warping and rotting of the plywood. If you’re in a similar situation or just want to build an elevated lifting platform that looks impressive then read on.
My original thoughts and inspiration came from this Gentleman and Meathead DIY, which uses rubber mats along the sides of the platforms where the weights land to protect equipment and floors alike from damage when dropping weights. https://gentlemanandmeathead.com/training/diy-build-an-olympic-weightlifting-platform/
Plywood lifting platforms are very affordable and easy to make, so it’s almost always a better choice to simply make one yourself than buy one.
I was fortunate to have access to 2”x6" decking from tearing down an old deck and 1” pine boards from relatives with their own lumber to make my lifting platform. The decking is used to make the frame for the platform and the boards make up the lifting surface. The materials to make a durable elevated platform will be more costly than a simple plywood platform. If you don’t have any moisture issues you can likely use plywood for your surface and save some money, although it might not be as strong of a surface, so be sure to reinforce underneath, especially along the sides where the plates will land.
The first step to knowing what you’ll need for supplies is deciding if you want to build a smaller 4’x8’ platform mainly for the big-3 powerlifting movements of squat, deadlift, bench, or if you want a full-size 8’x8’ surface (or maybe even bigger) for doing any stationary lifts you need, including olympic lifting. Because the surface will be elevated, make sure you also have the height clearance you need for overhead pressing or for a power rack if you’re putting one on the platform.
Supplies
- 11 - 2”x6”x8’ decking boards (If your elevation needs aren’t as great as what I needed to protect my equipment from potential flooding, you can probably save money by using 2x4s for your frame. If you’re building an elevated platform mainly for aesthetic reasons, or you have low overhead clearance, I would go this route).
- 12 - 1” x 1’x8’ pine boards (This is what I had access to, but you can use a stronger type of wood if you have access to it or the budget for it)
- 1 - 4'X8' 3/4" rubber stall mat. (I found a 4'x6' rubber mat on sale and used that instead along with some additional rubber flooring that I already had to cover the remaining area).
- A bucket of 3" screws for decking. You'll need about 40 screws.
- 2" screws for affixing the surface boards (approximately 8-10 screws per board)
- 1.25" screws with washers for holding the rubber mats in place on the platform. (Glue like liquid nail glue could be used to permanently fix the mats to the platform, but I preferred screwing it down to allow for repairs, adjustments and disassembly if I ever have to move the platform.)

- Wood stain and polyurethane coating, or use a 2-in-1 Polyshades instead of 2 different products.
- Paint brushes for the Polyshades
- Sandpaper (80-120 grit is good for a smooth finish)
- Utility knife
- Chalk or metallic sharpie marker
Tools you'll need:
- Cordless drill/screwdriver
- Mitre Saw or circular saw
- Belt sander
- Hammer
- Tape measure
- Level
- Right angle
- Planar (I had access to a planar, but if this is unrealistic for you then just make sure that your top layer of planks matches the thickness of the rubber flooring you'll be using. If you can find 1" thick stall mats for the side bumper regions then use the same 1" pine boards for all 12 boards. if you can only find 3/4" stall mats and can't plane the boards down to 3"/4" then you will want to find 3/4" boards for the 4 boards making up the top layer, unless a slight difference in depth between where you stand and your plates rest doesn’t matter to you).
Getting Started
If you haven't already done so, figure out where you'll be building your platform and clear the space around the area.
Start by cutting all the boards for the decking underneath the platform. Since my boards came from salvaging an old deck, I started by removing all the old nails and assessing which boards were the best and choosing those ones to make up my outer frame, both for aesthetic reasons and structural integrity.
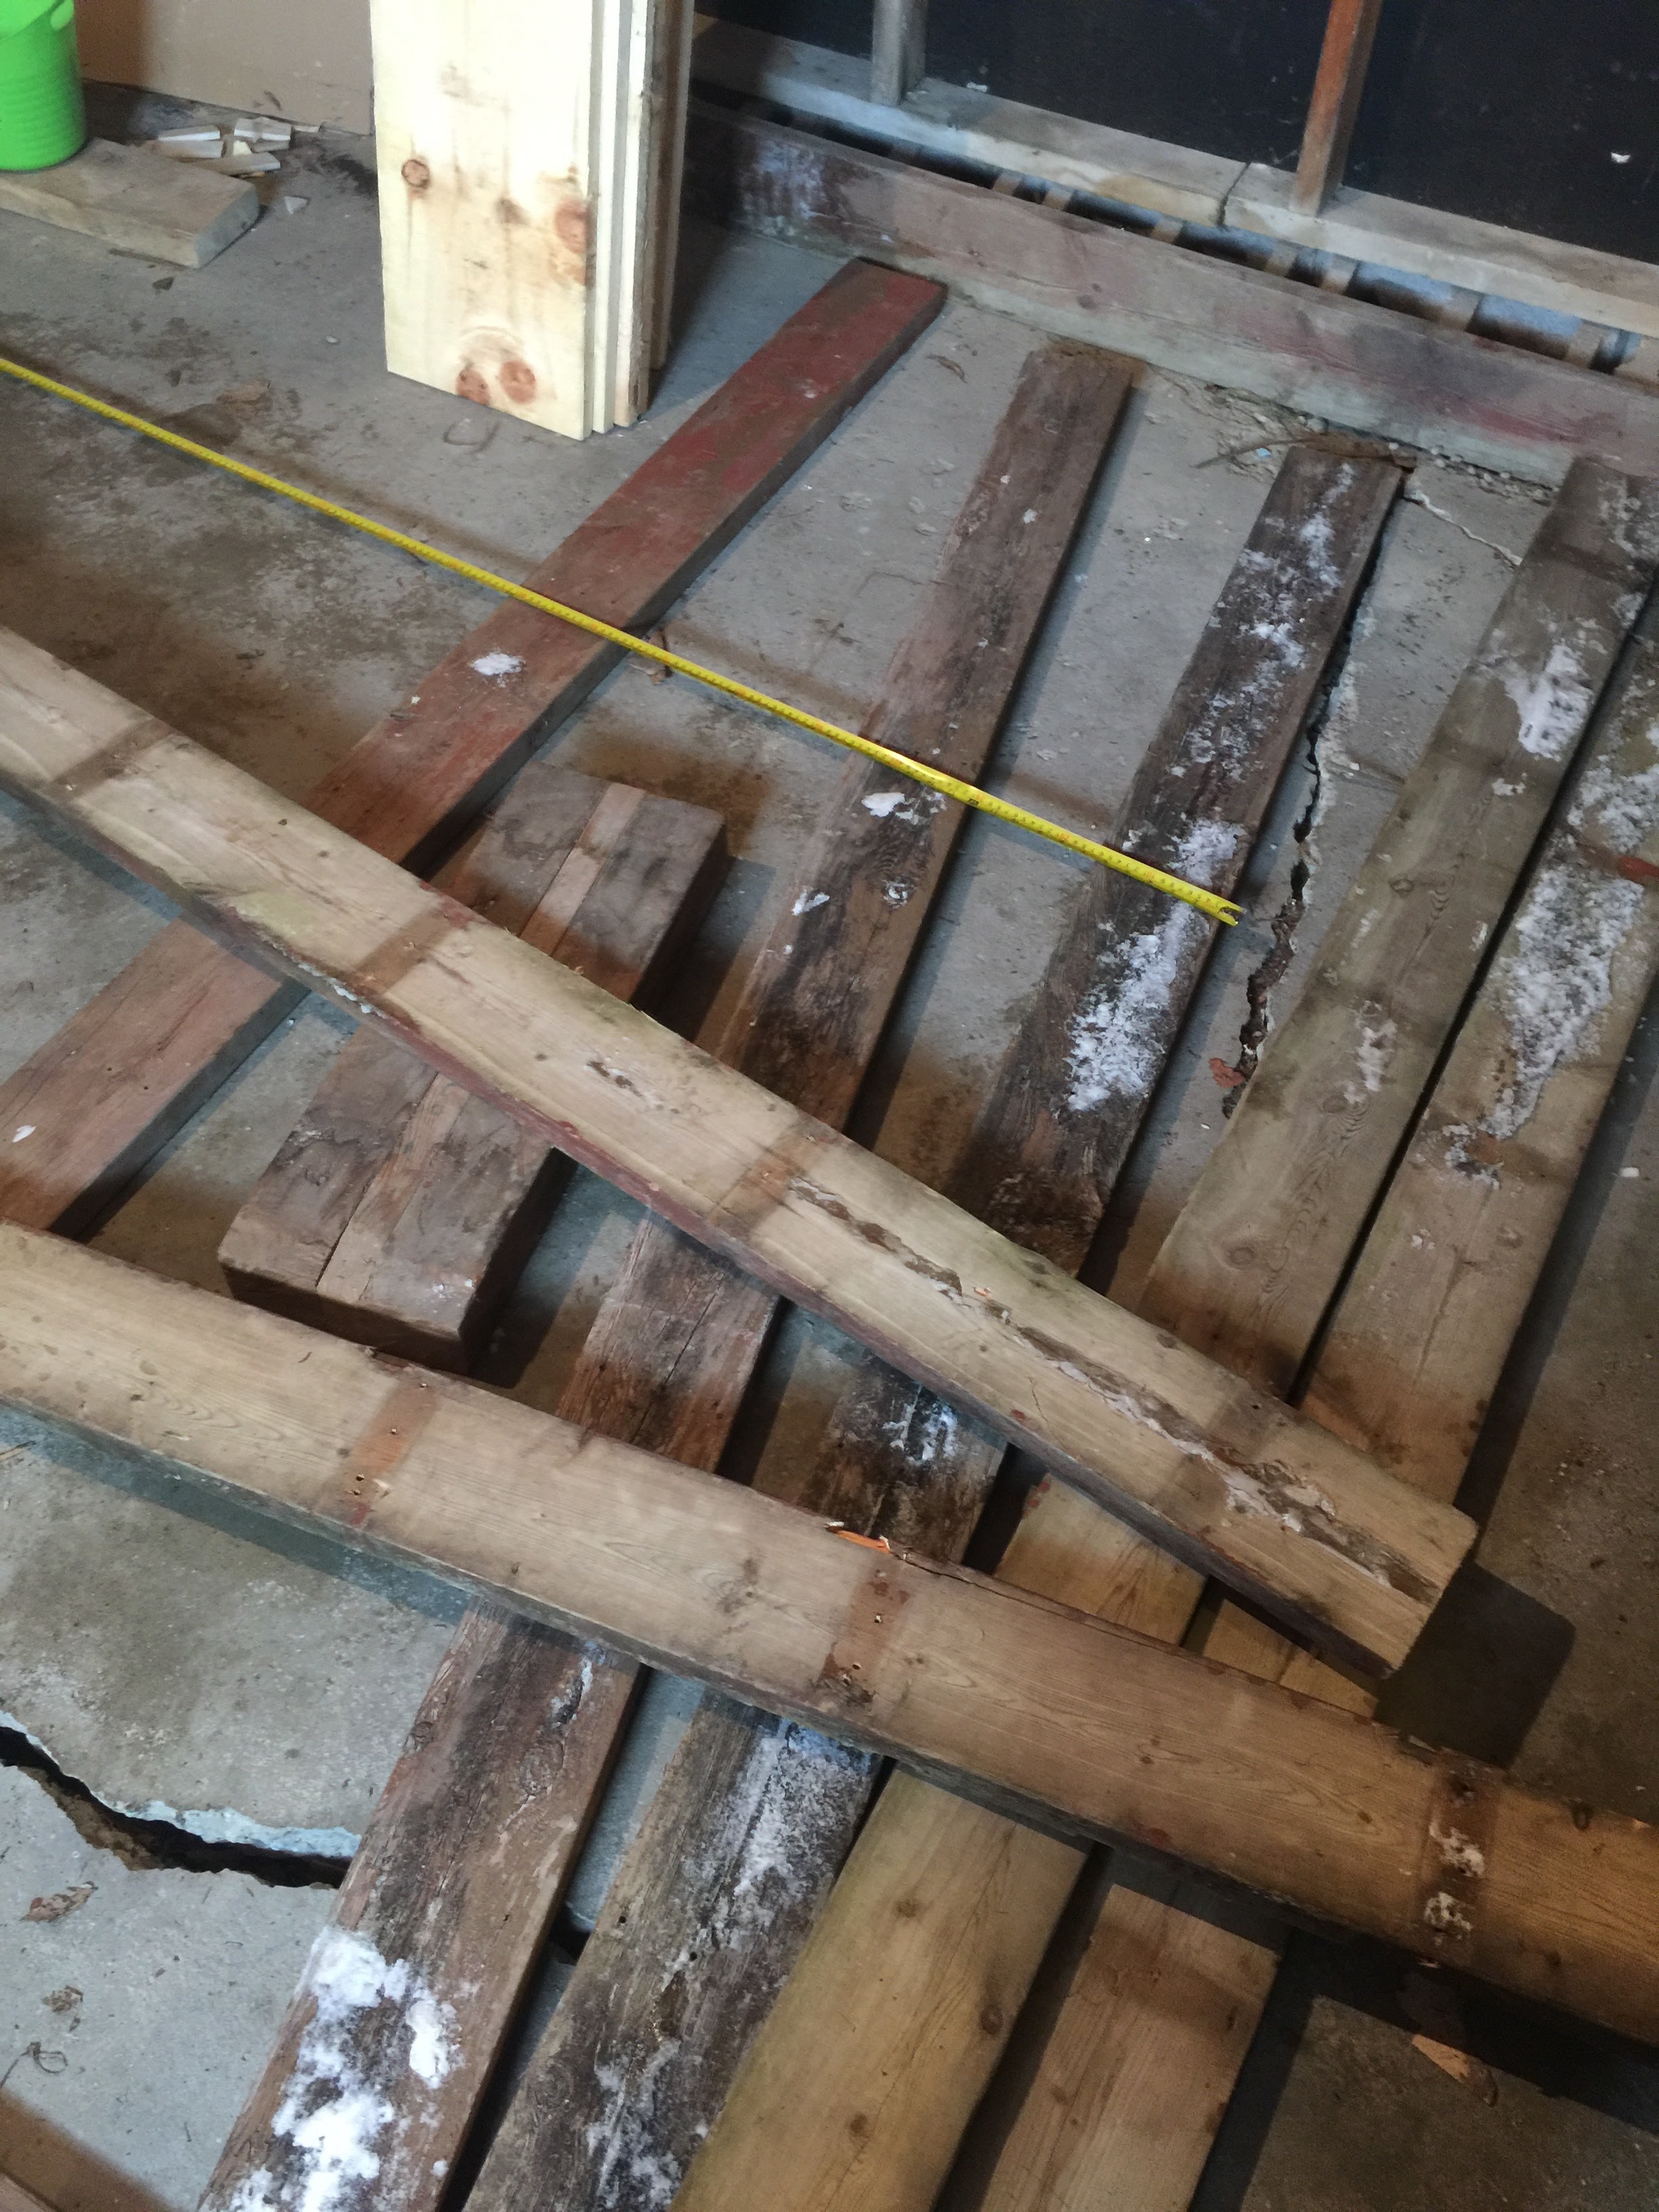
Cut two of the boards to exactly 8' in length. The rest of the boards should be cut 4" shorter than 8" to make a square 8'x8' surface, so they should be cut to 92”. Two of the 92” boards obviously make up the outer sides of the platform and the rest will be spaced about 16” apart, as is shown in the images.
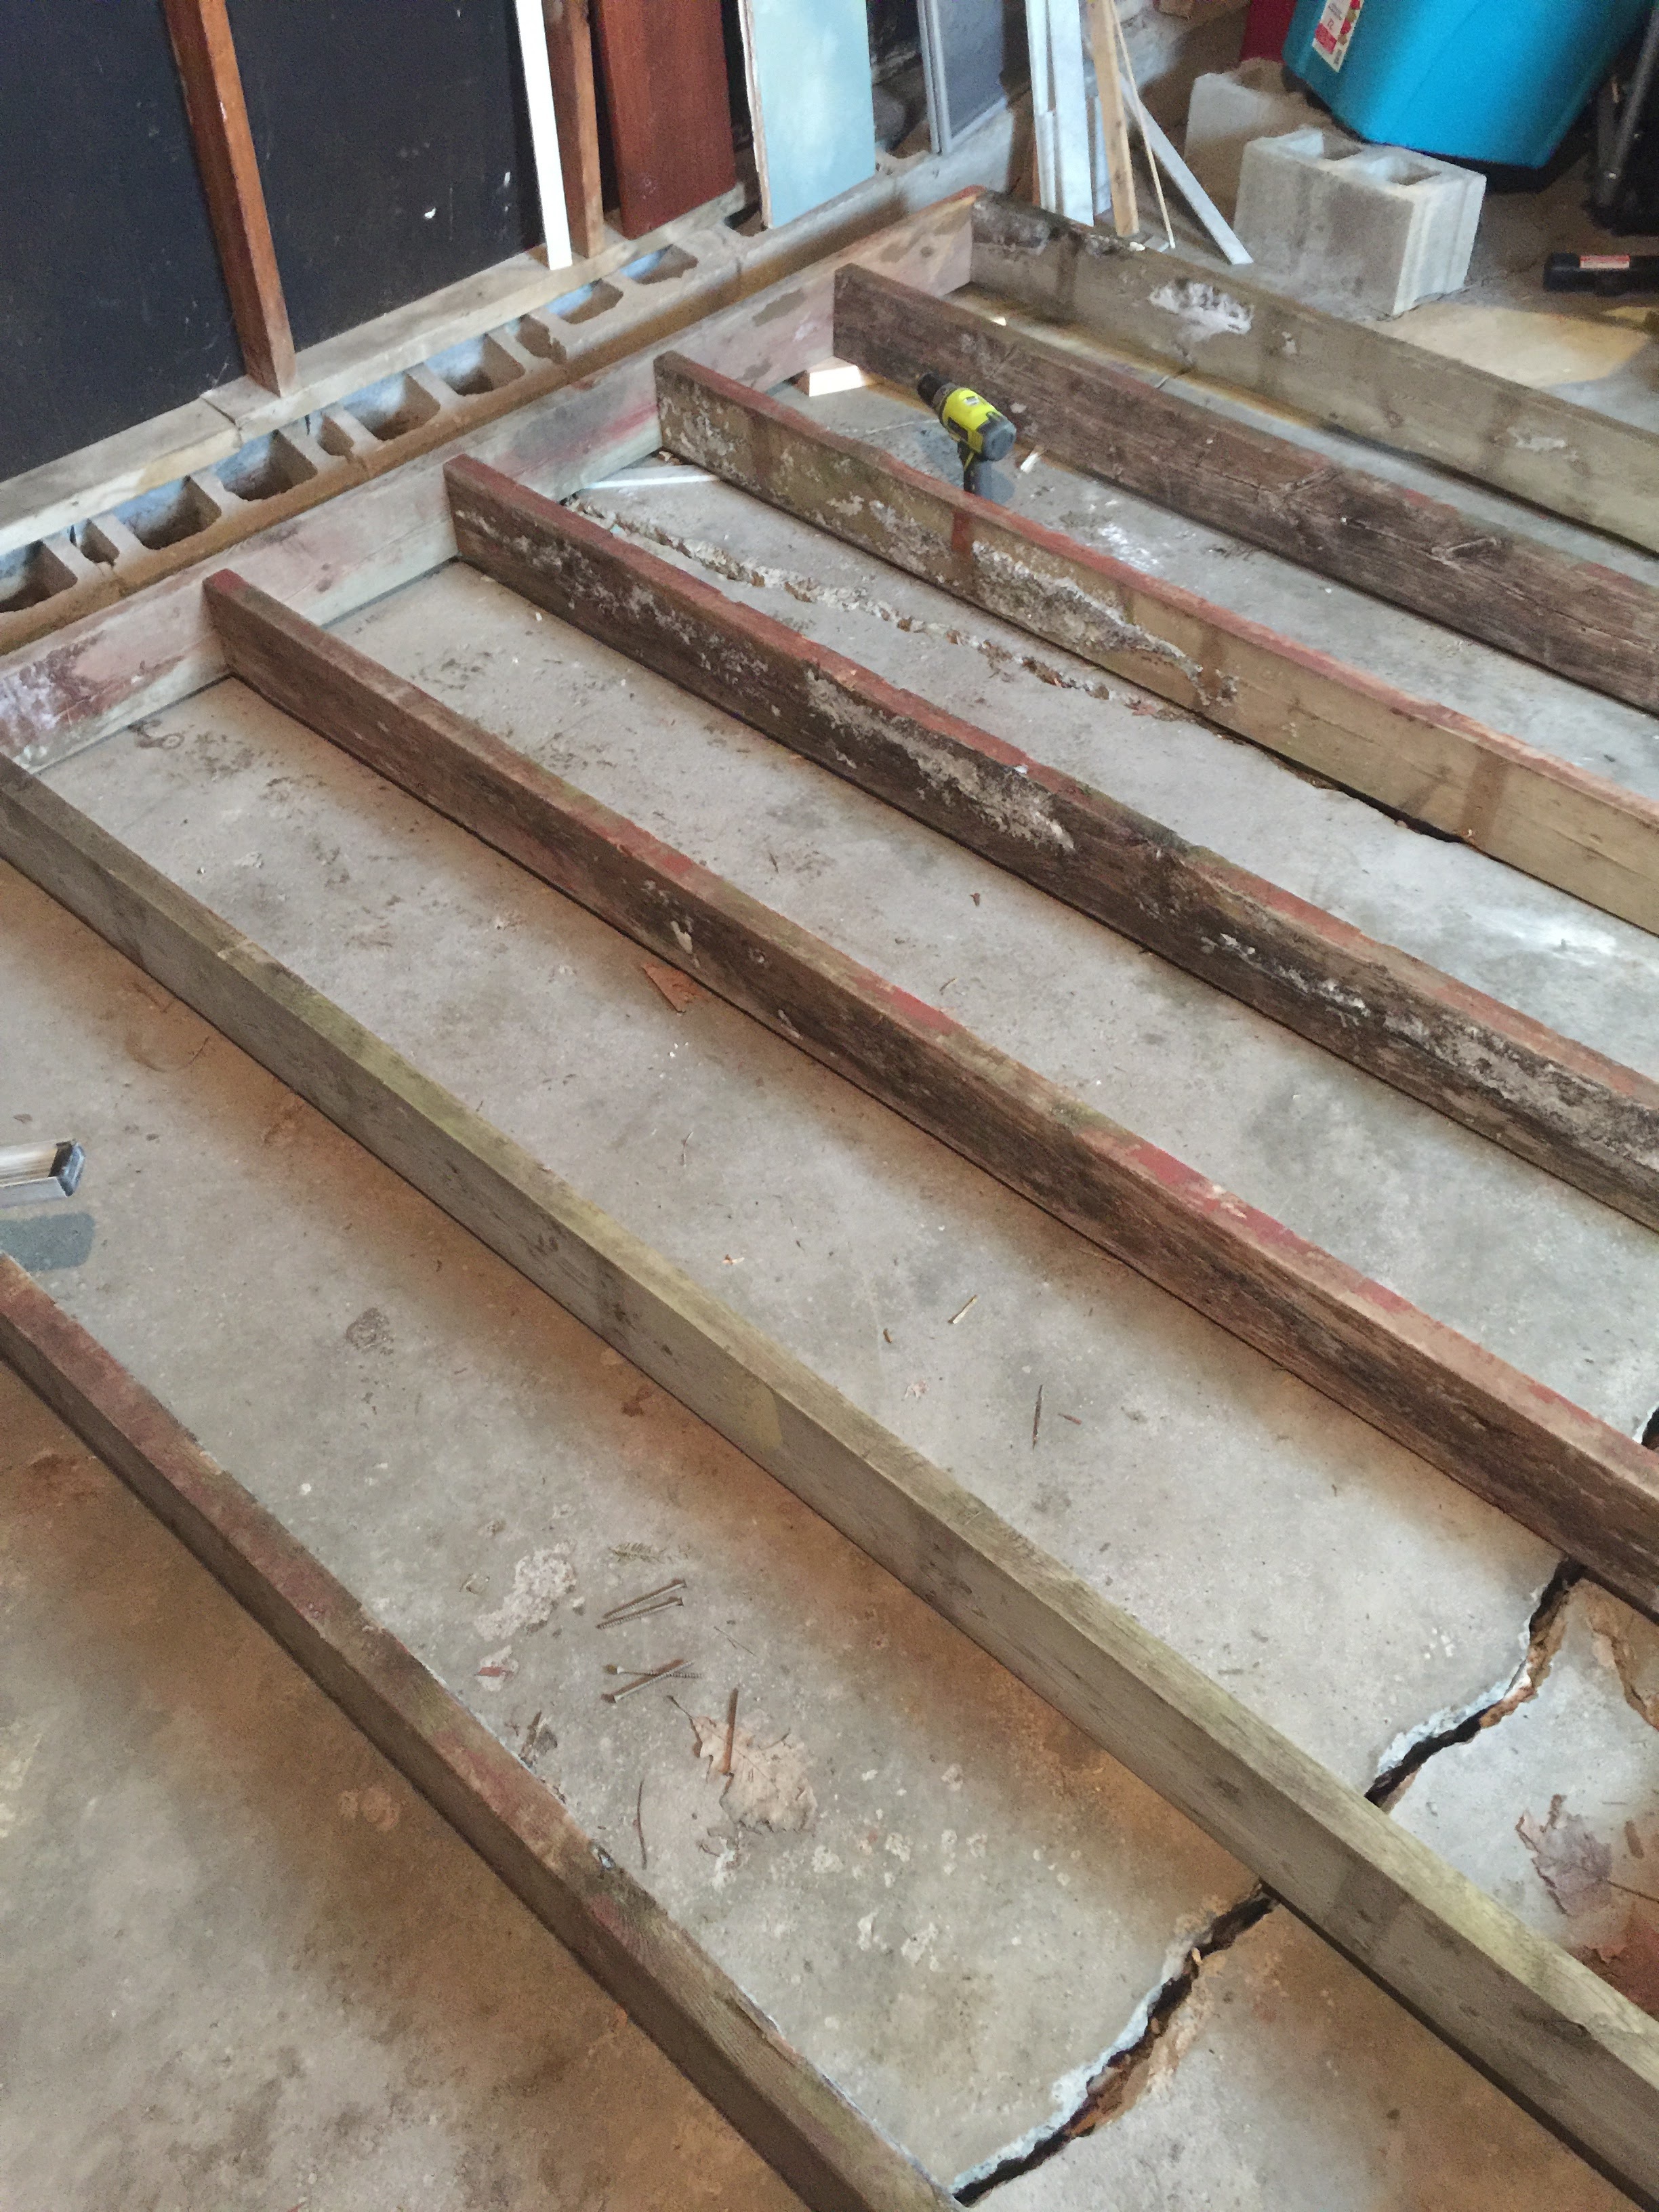
Make sure that the two 8' boards are arranged parallell to each other with the other boards being placed inside when screwing together. Otherwise the frame will be more rectangular. (See diagram).

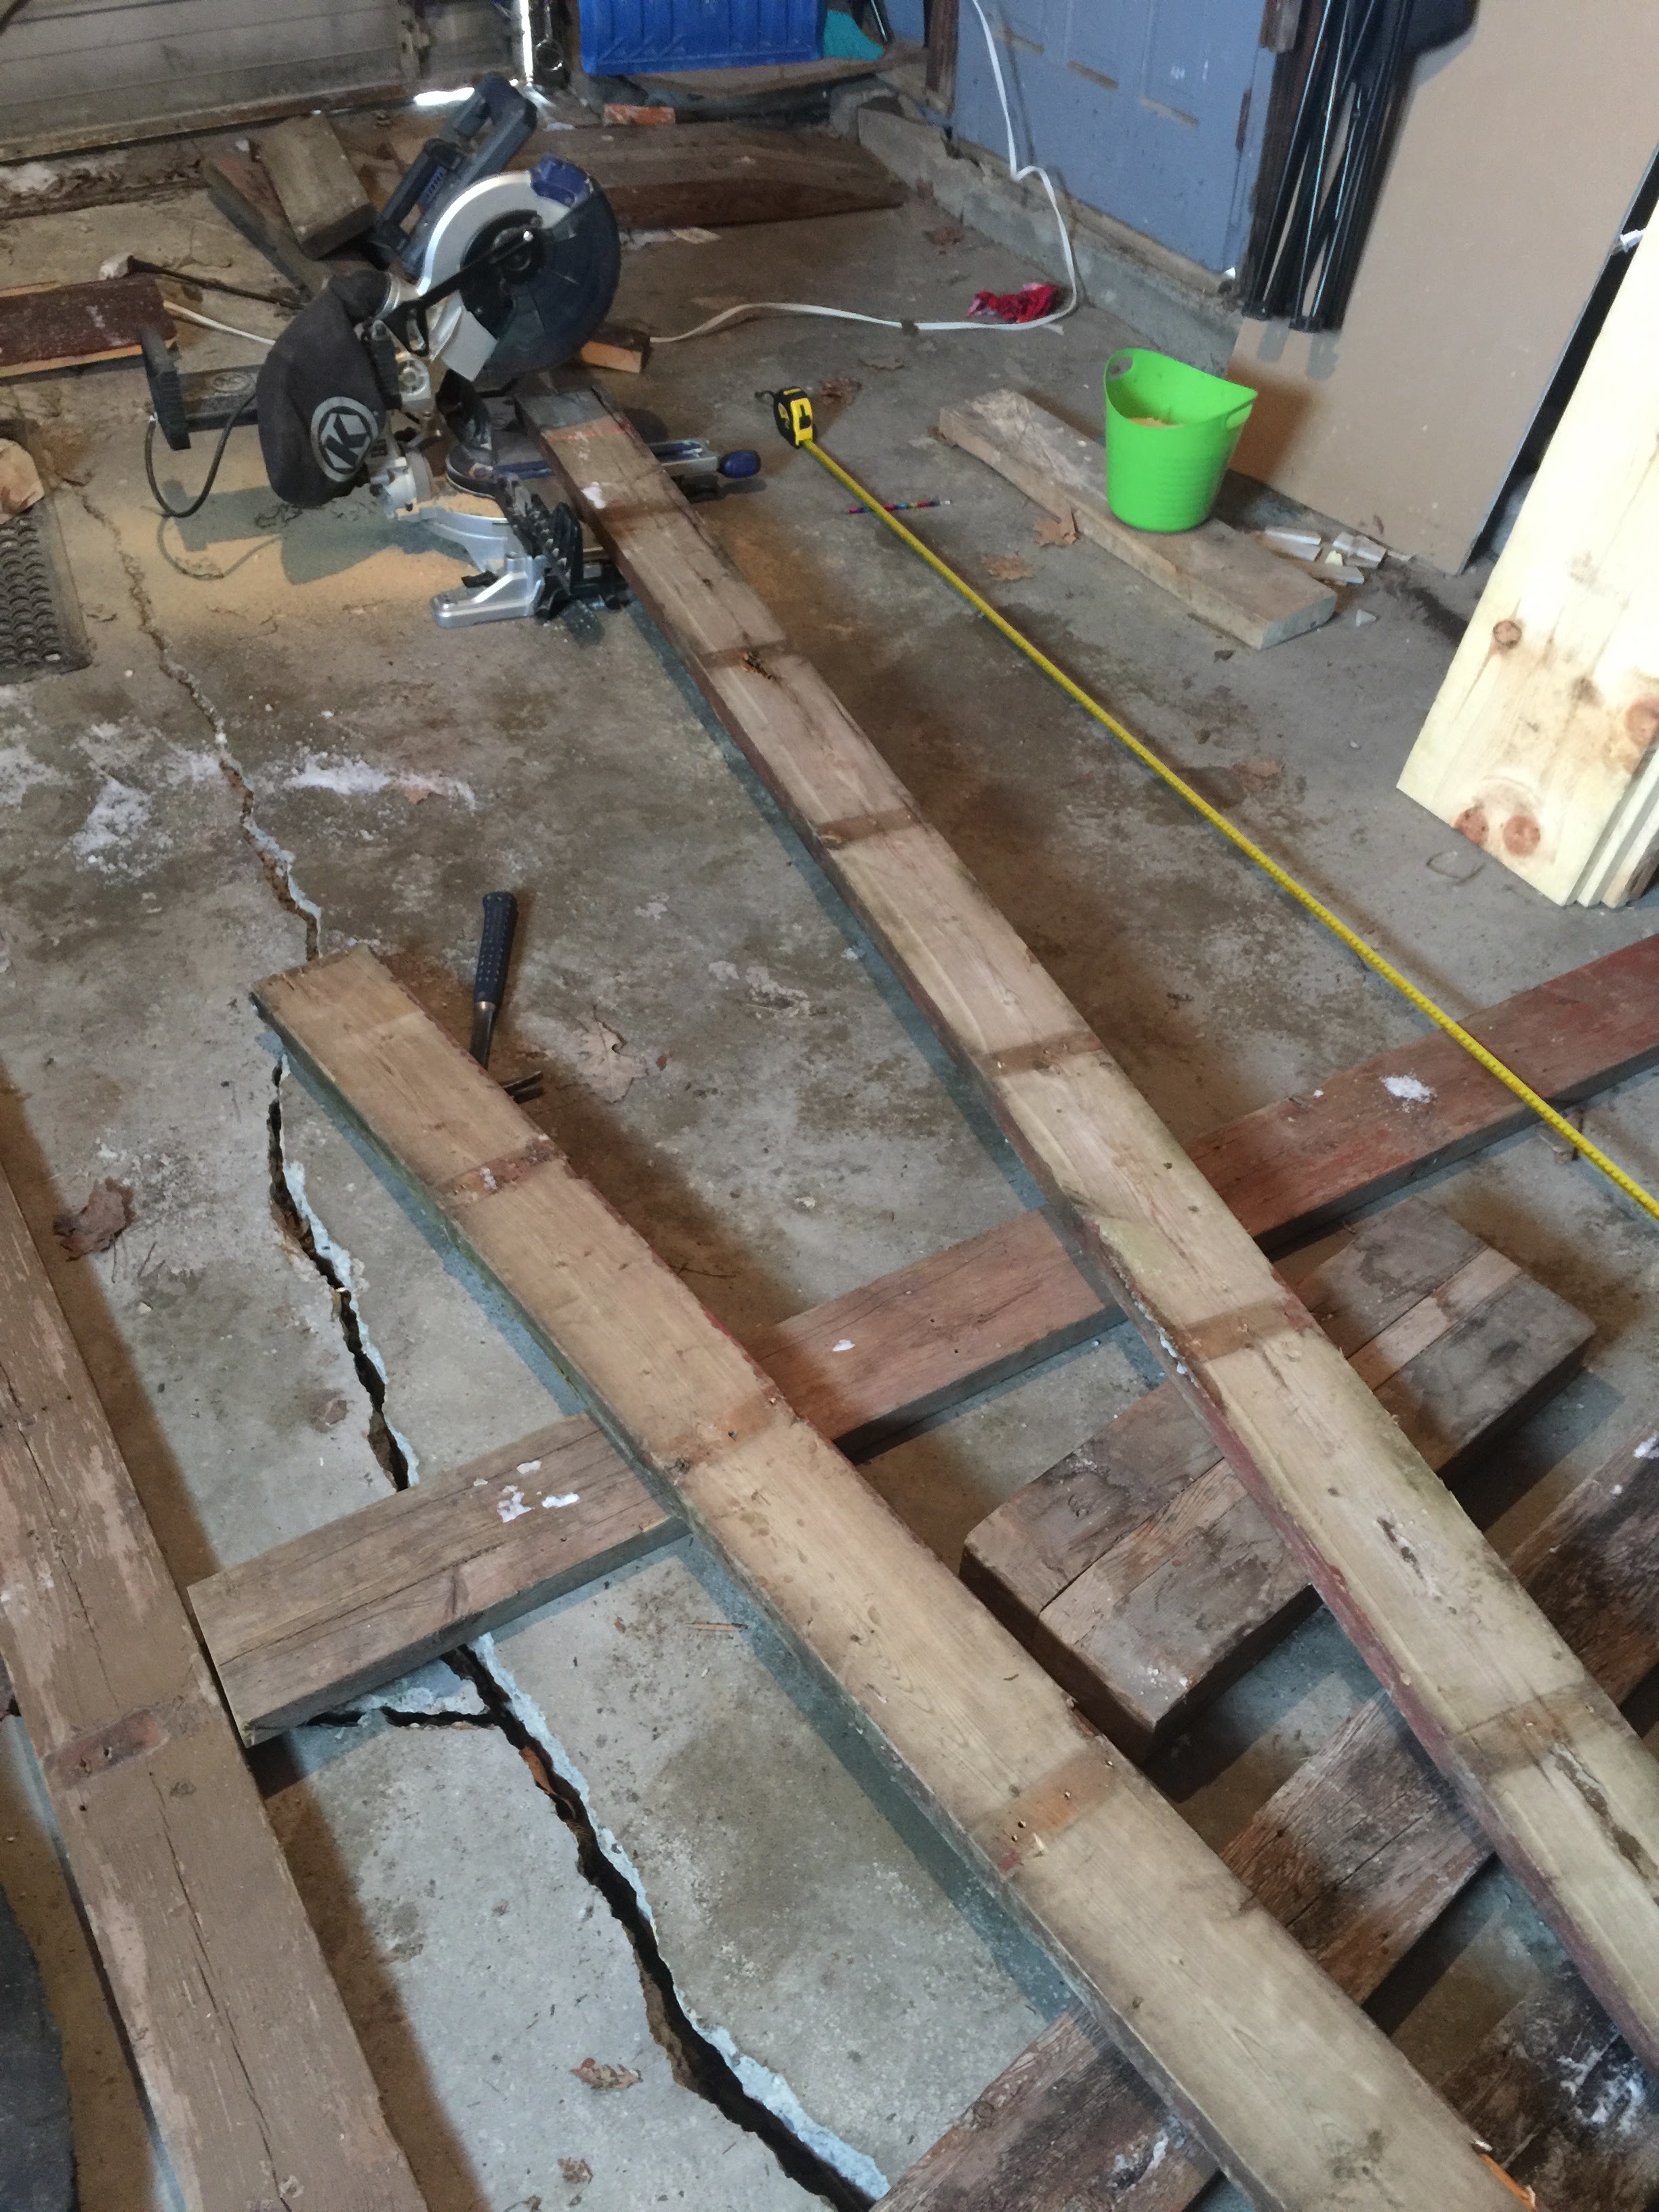
If you're building a platform to accommodate an uneven and cracked surface like me, either find a flat surface for putting the frame together and then move it back into place, or just ensure that the boards are squared and level when you start screwing them together. I had lots of extra pieces of scrap wood from extra decking and what was left after I started cutting the main frame to use to start levelling the platform as I was putting it together. This helped to ensure that all boards were screwed together straight and not going to be warped or uneven.
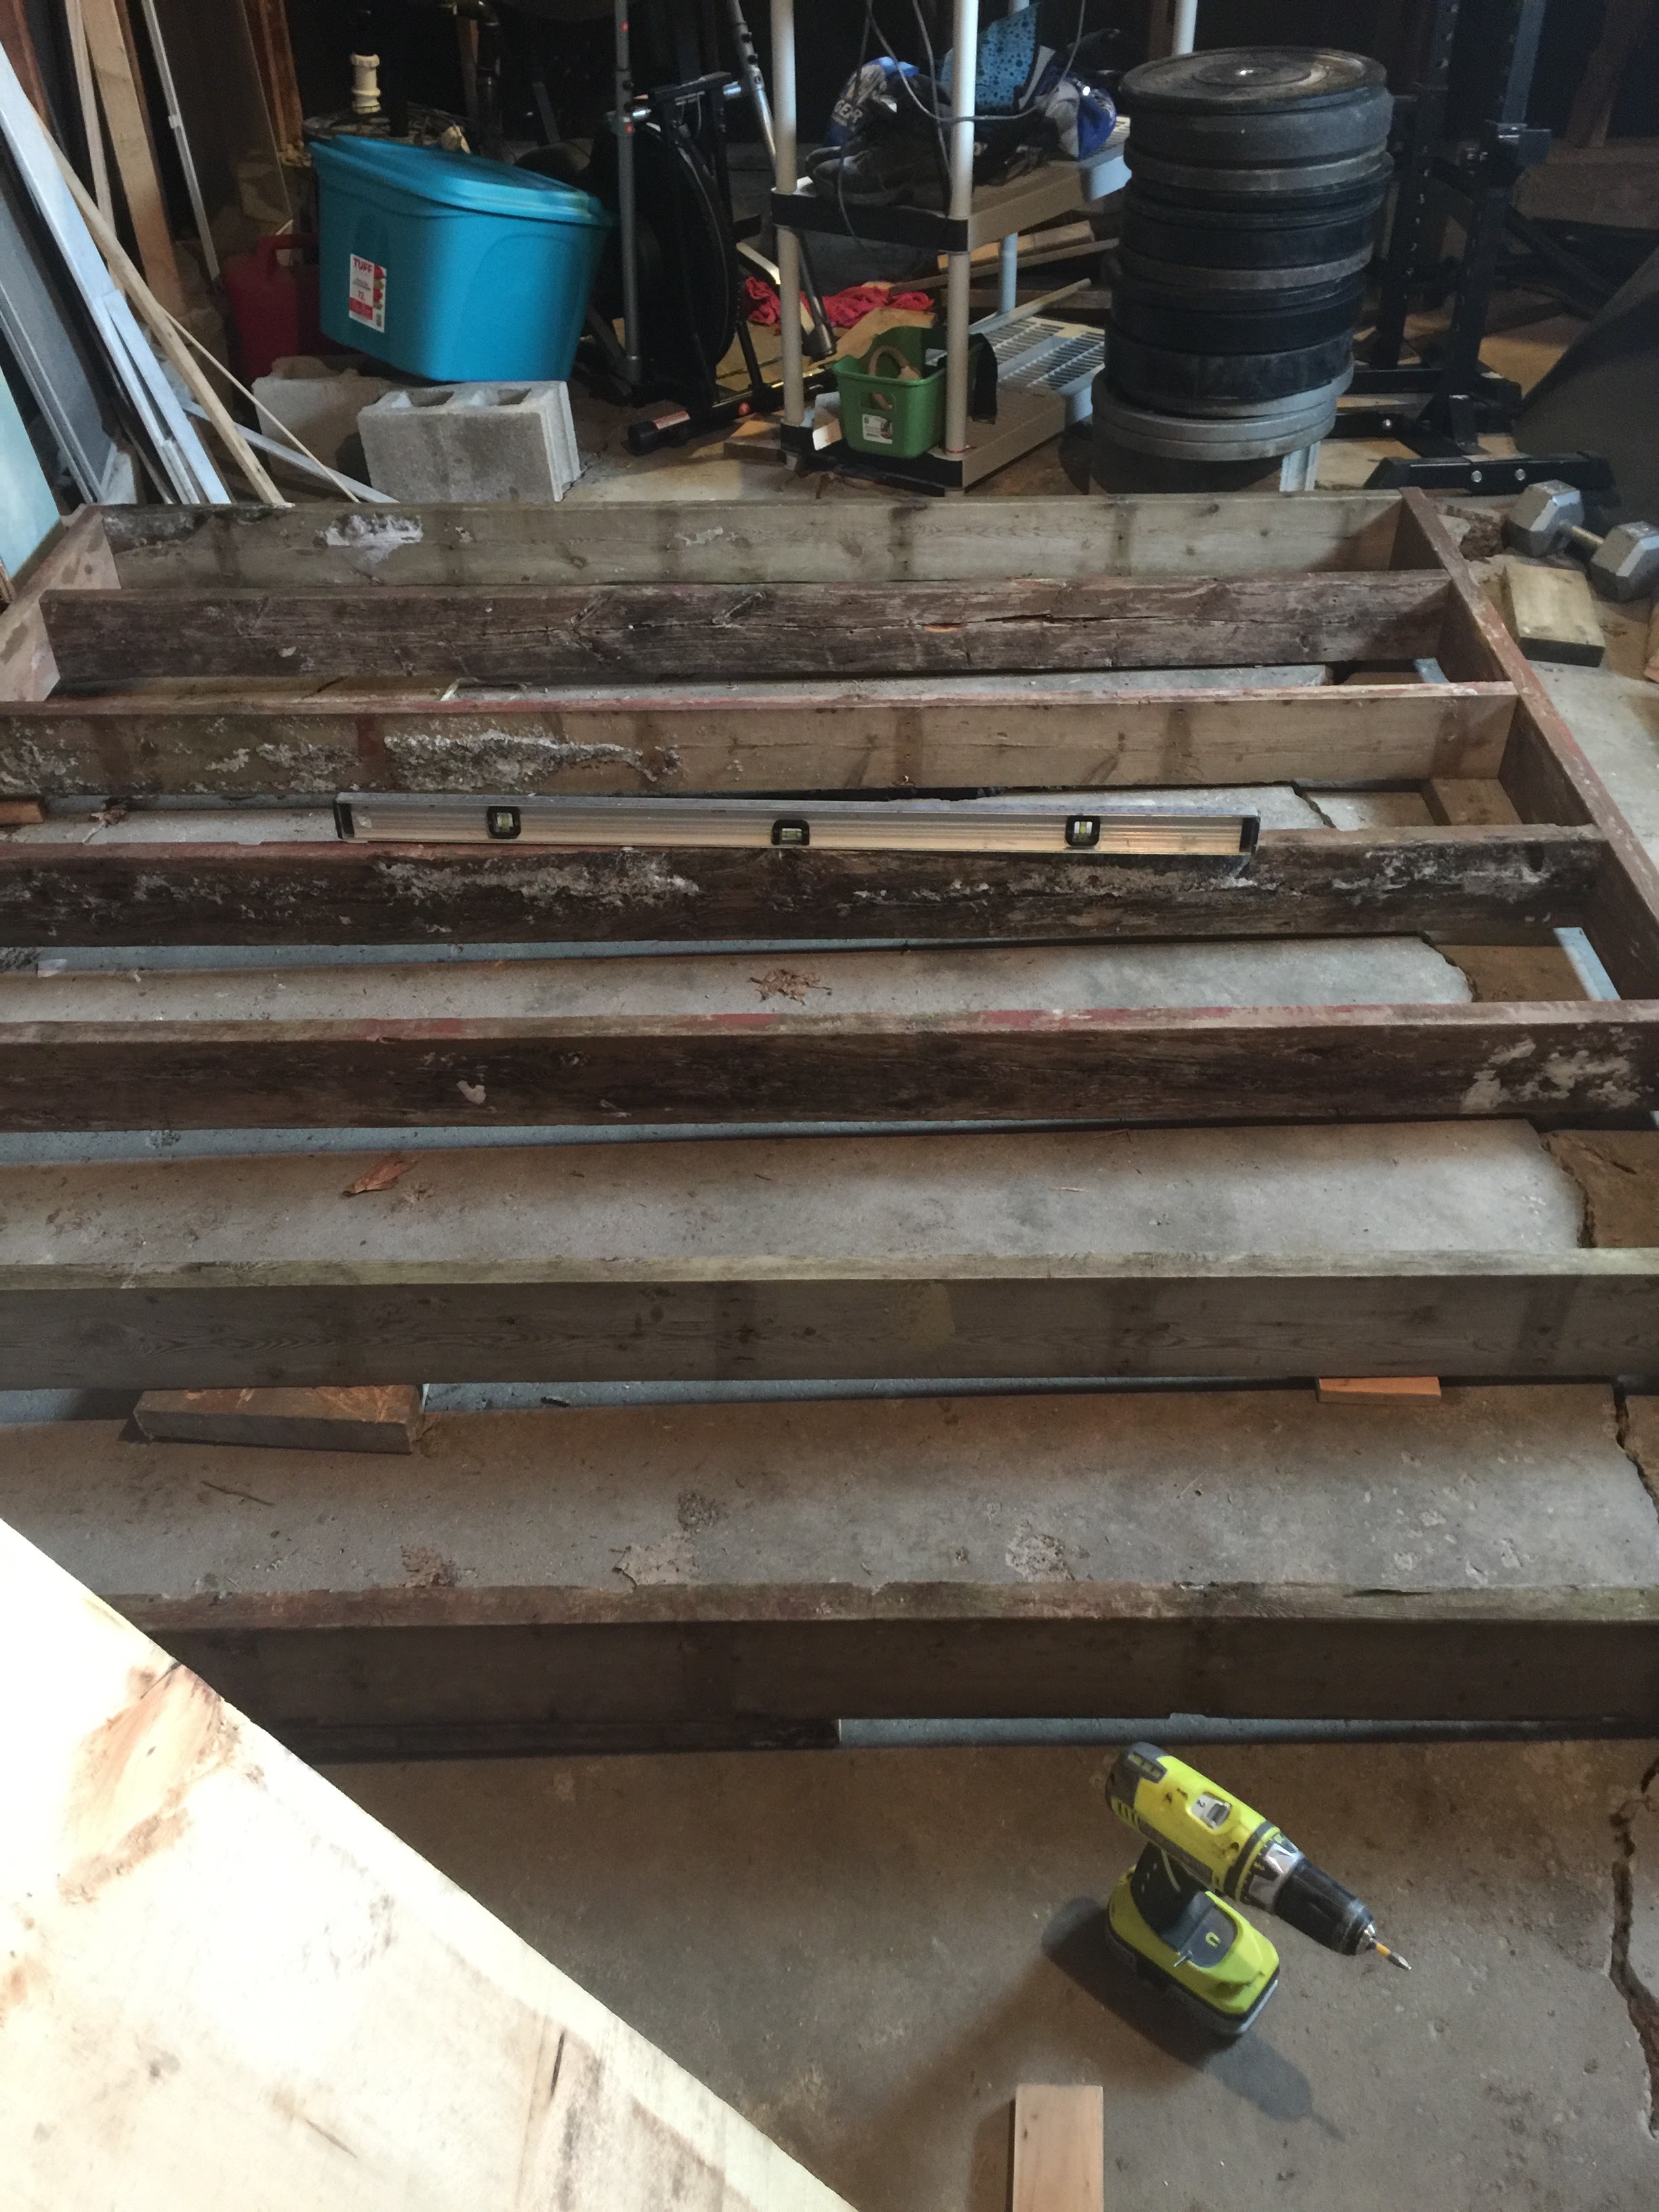
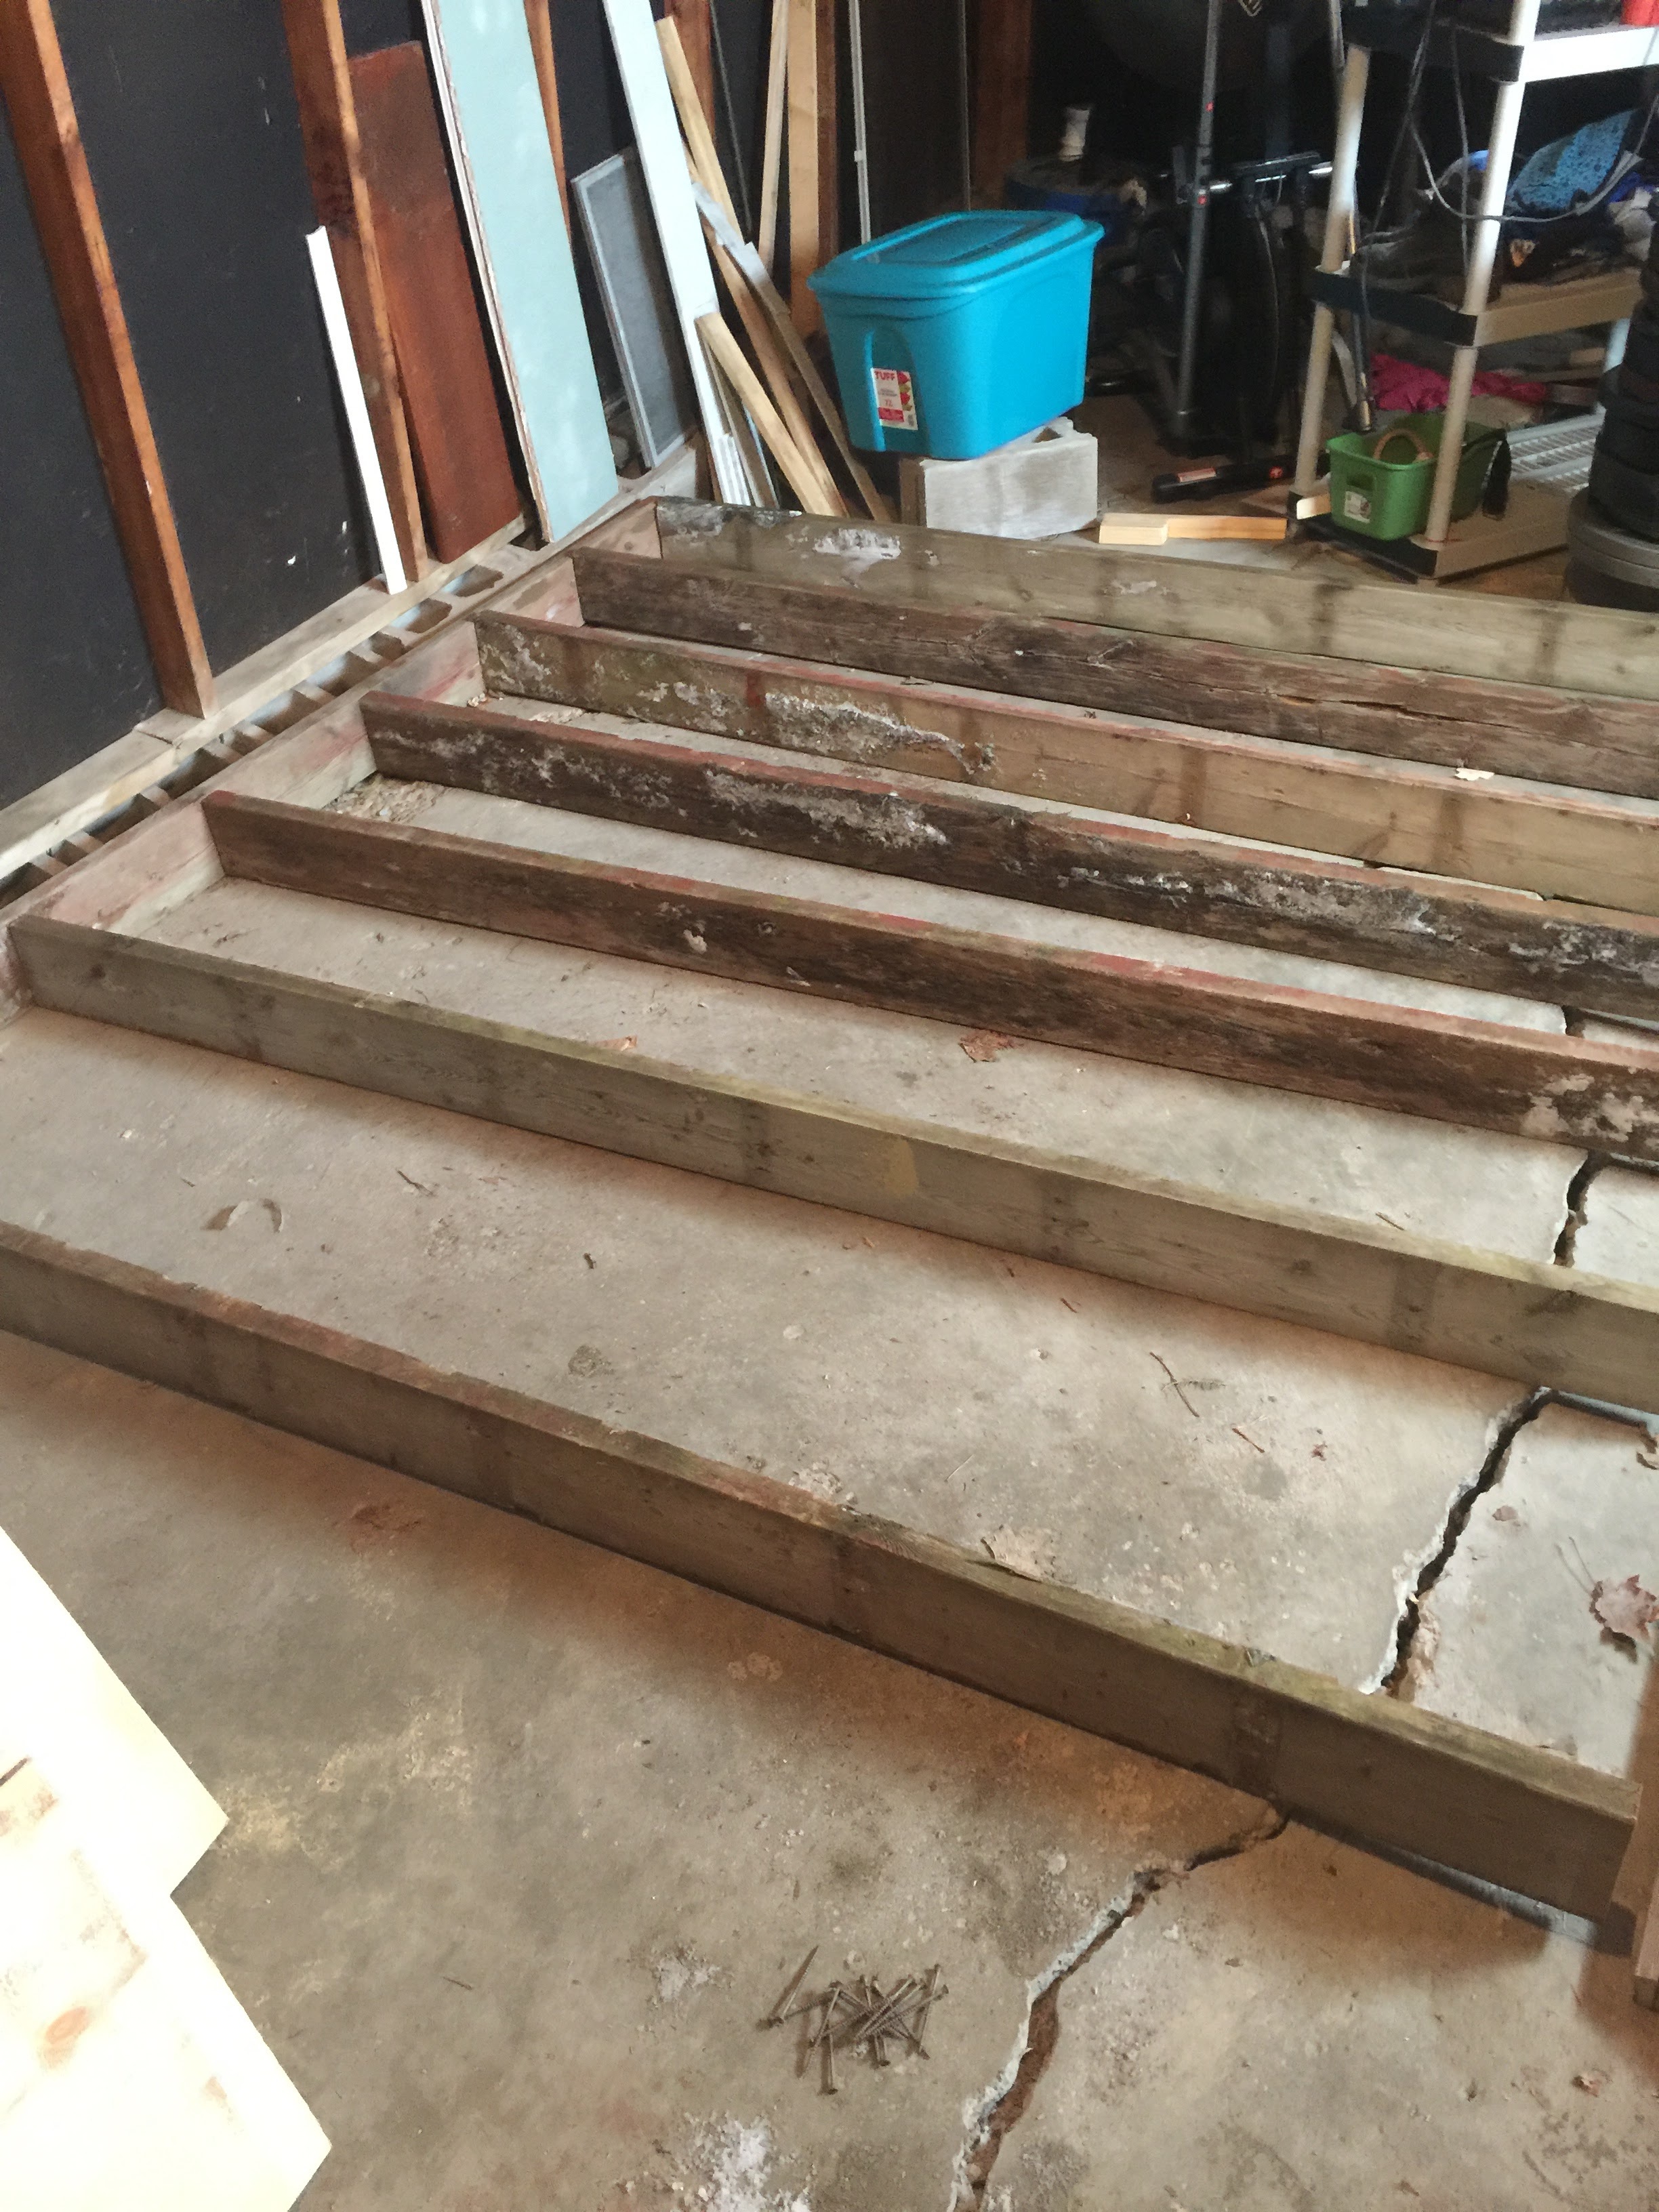
Once you've got all the framing screwed together and you've made sure that everything is solidly screwed together, use your level and some scrap boards or shims to make sure that all sections of the platform are level and not wobbly. Walk around on the framing to ensure that all boards were properly screwed together and that there is no teetering or shifting as you move to each corner of the frame.

Reinforce these areas.
Note: following this next step when building a raised platform is important and I didn't realize it when first making the platform and caused damage the first time I dropped a weight.
When you are satisfied with the frame structure, reinforce the zones where the plates will make contact with the platform, especialy if you are doing any olympic lifting or dropping weights from height. Ideally you will have a few extra 2"x6" boards and can reinforce the entire length of the platform in the outer two feet where weights will land. If you've run out of full length boards you can reinforce the zone that will bear the brunt of the lifting. For me this was almst exactly the middle of the platform. I didn't have enough full length boards for this reiforcement, so after I had attached most of the sublayer of top boards, I screwed my reinforcing boards to the sublayer to cover the most susceptible area.
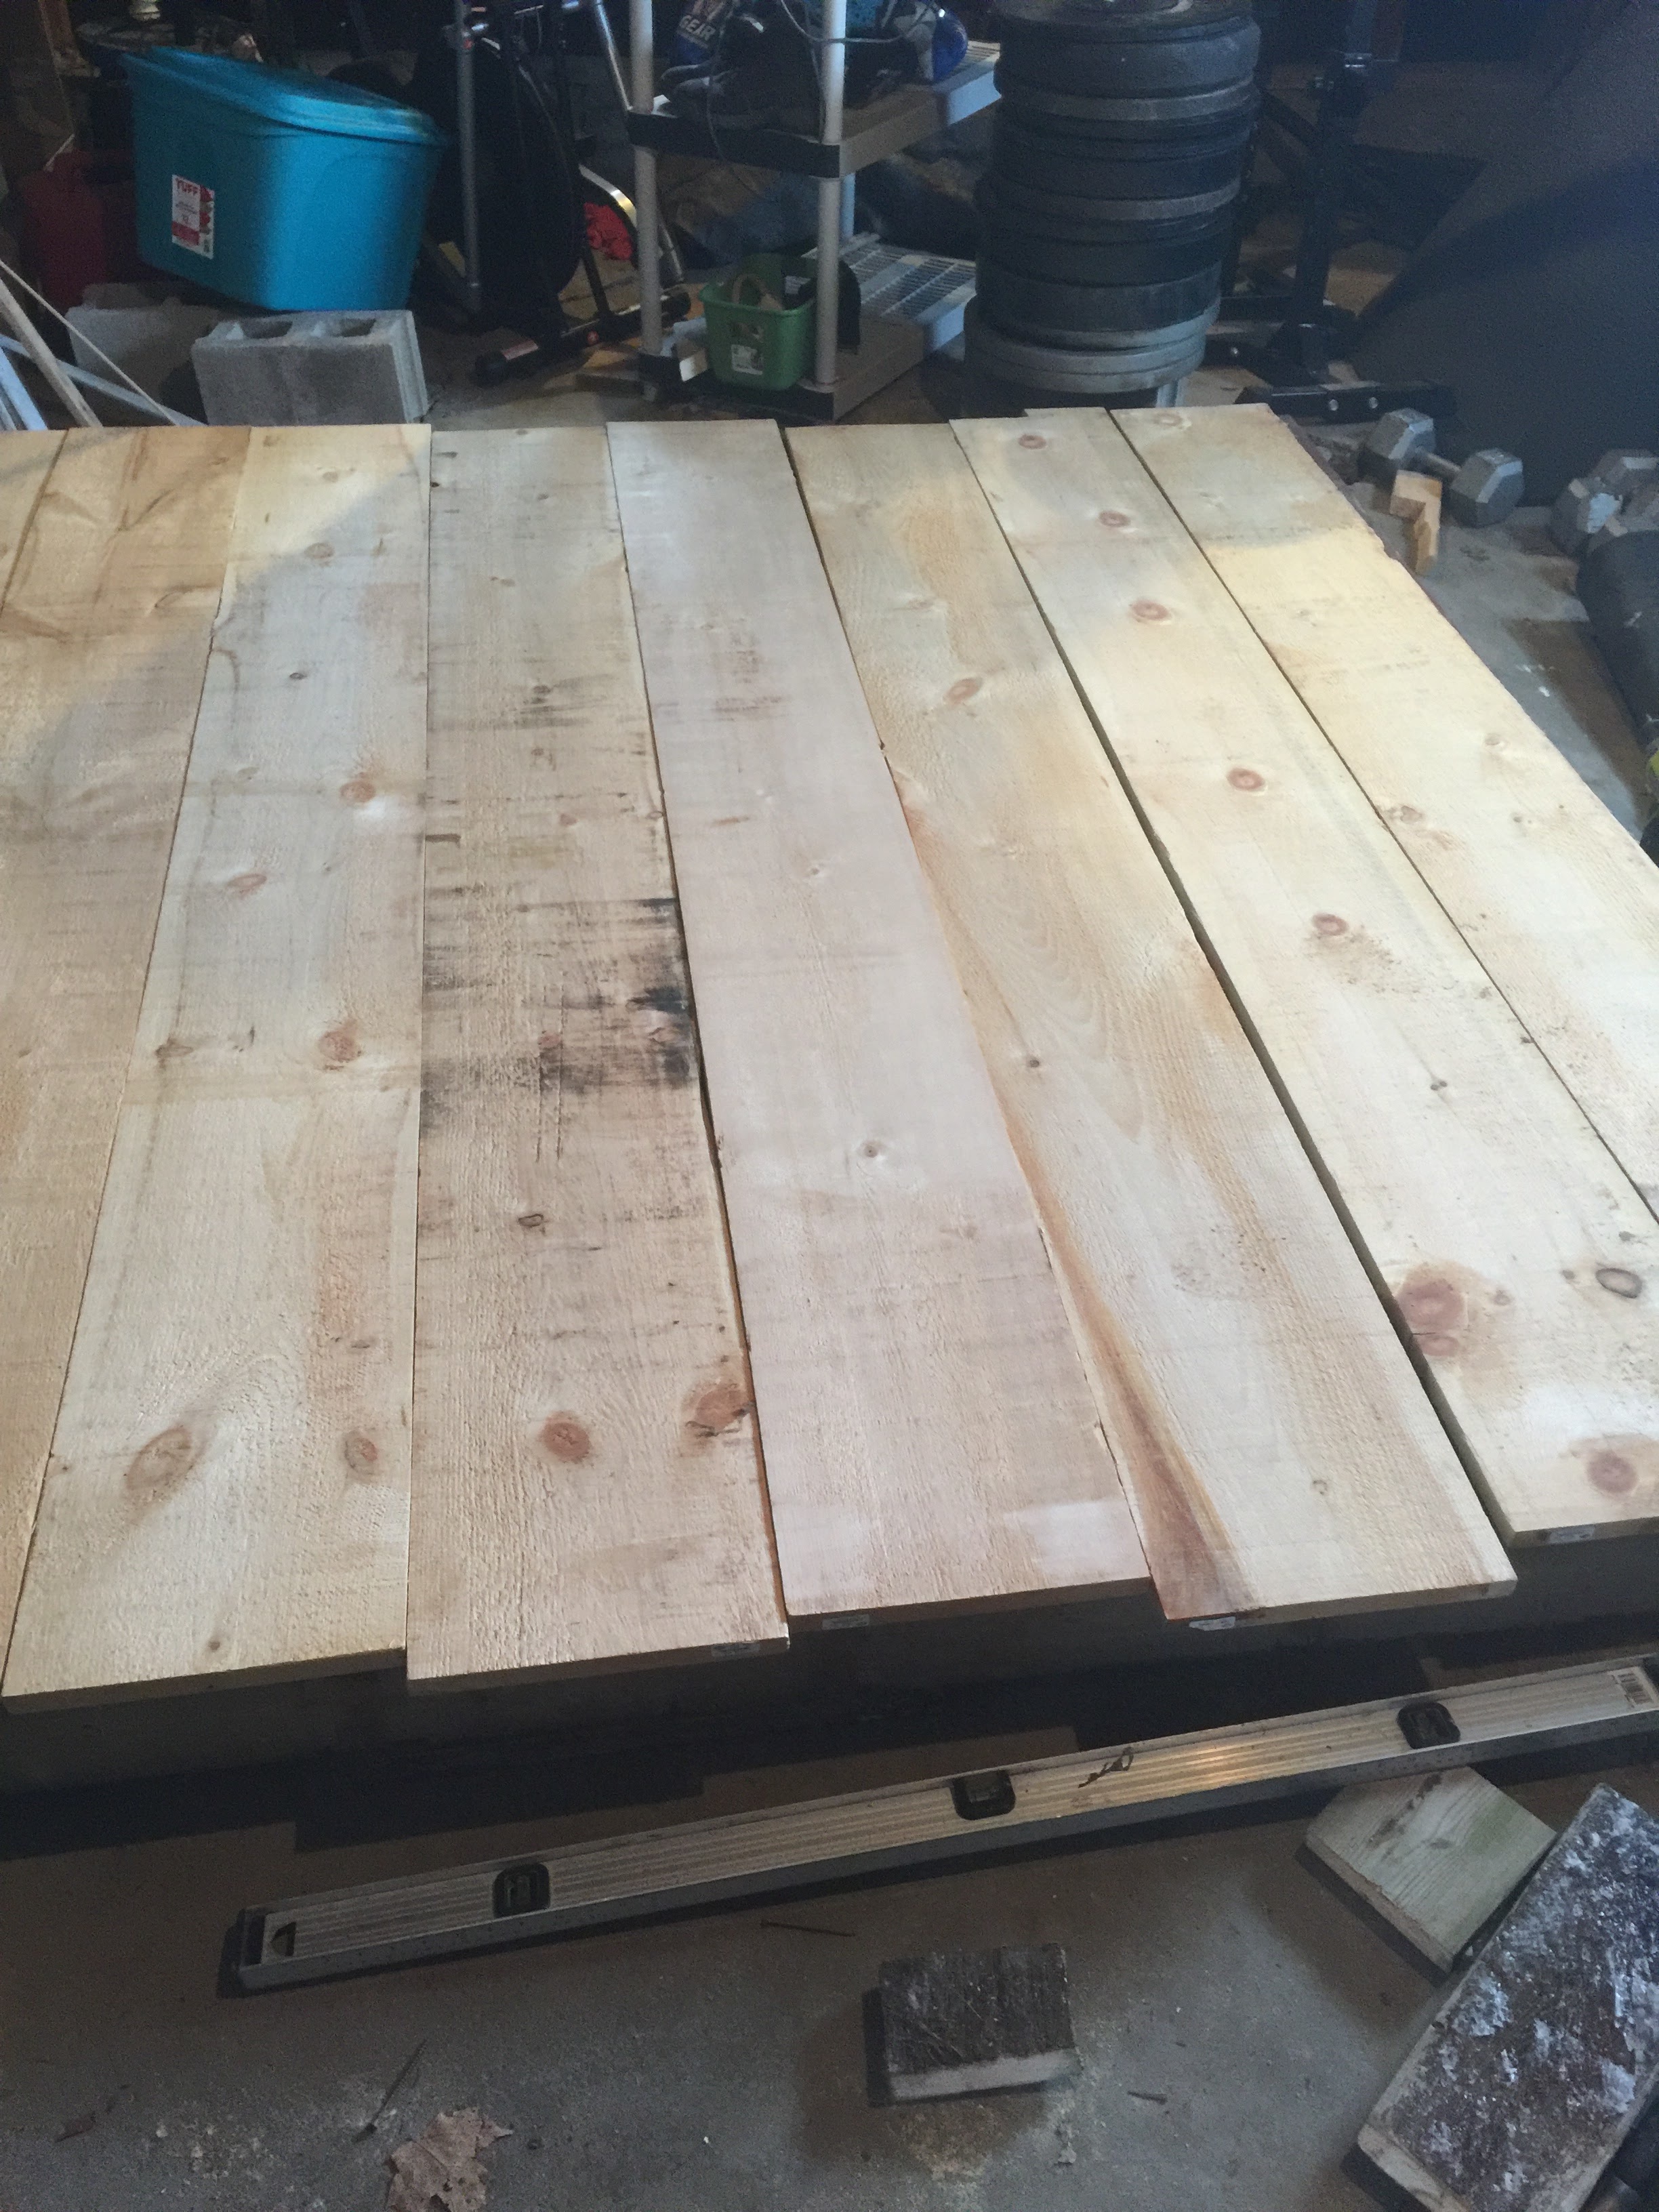
With your frame done and the sides reinforced, we can start to put together the surface. The surface is made up of two layers: a sublayer and the top layer consisting partially of rubber matting on the sides and finished, sanded boards in the middle. For additional structural integrity I would suggest that the sublayer is screwed to the frame perpendicularly to the direction in which you are going to lift, that is to say opposite of the direction in which the rubber mats will lie lengthwise.
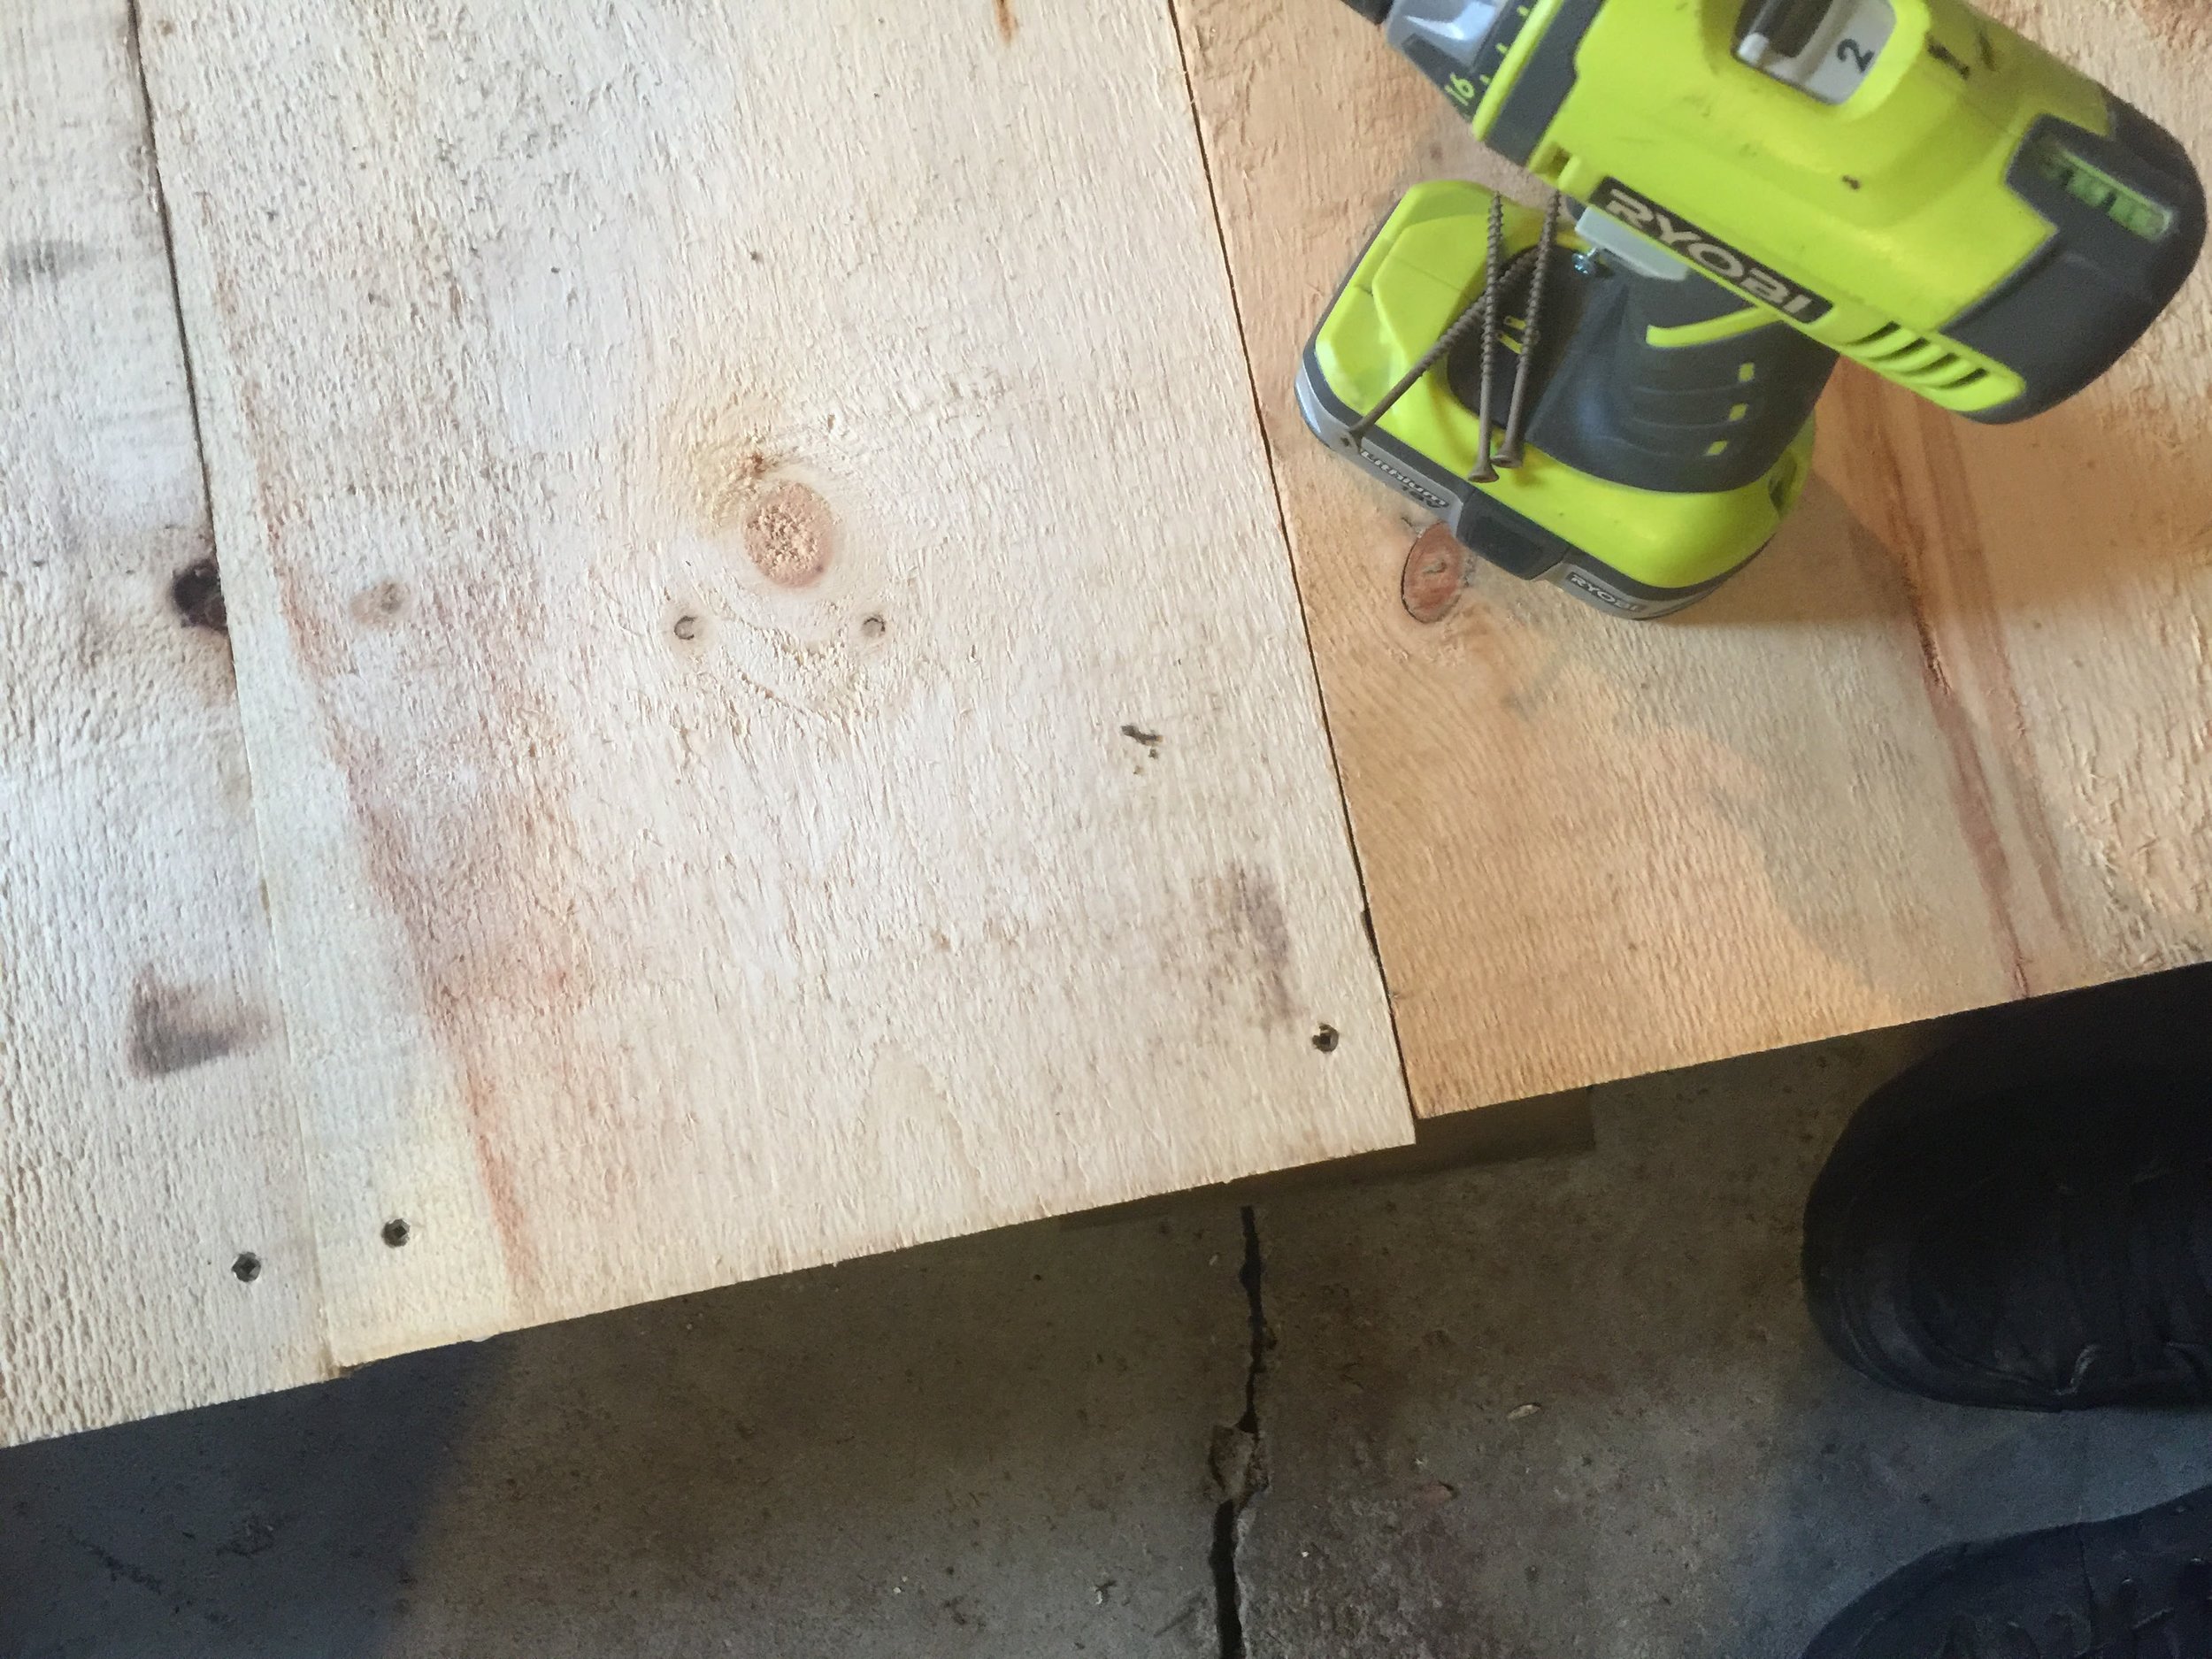
Use your tape measure to mark 16" increments along the sublayer, screwing all the boards down well and ensuring that there aren't any areas that lift or shift when you shift your weight on top of the platform. The edges should be aligned if you care about the aesthetics of the platform.
With the sublayer complete, it's time to work on the top layer.
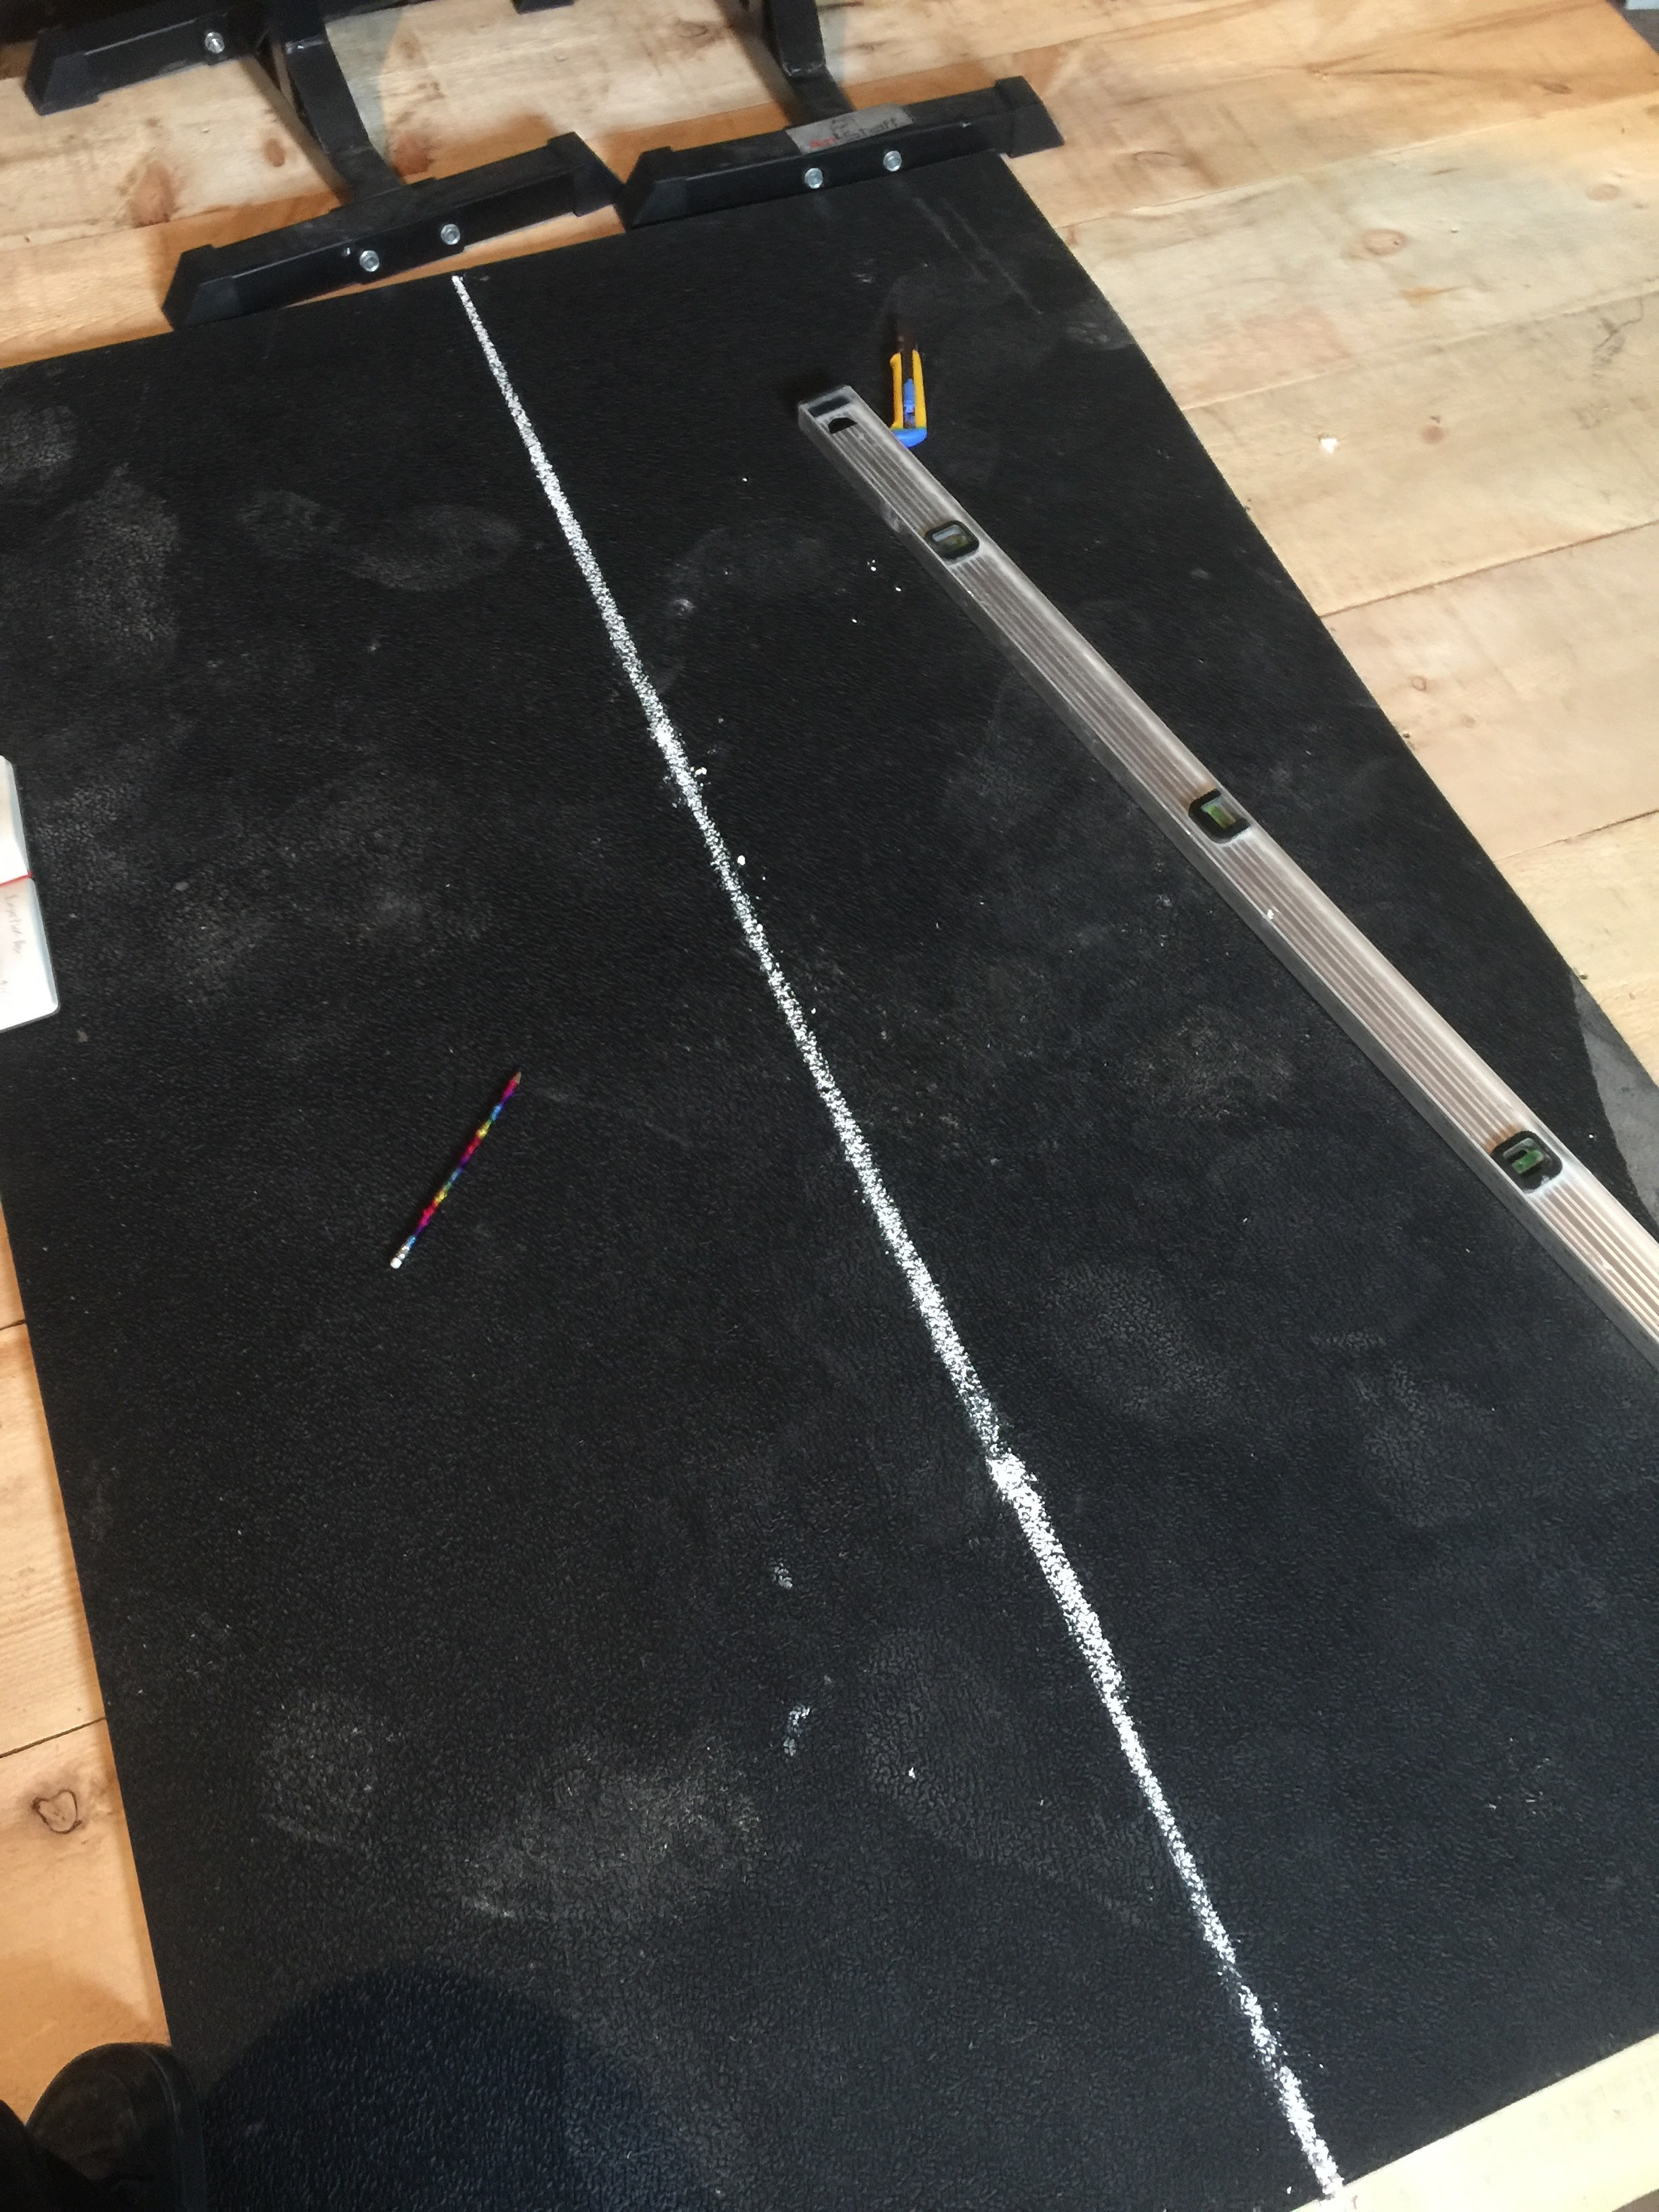
I bought a single 4' wide horse stall mat, so it had to be cut in half to make the side bumper zones on the platform. This will likely be the case for everyone using rubber mats, because I don't think you'll find rubber flooring that's only 2' wide. Measure out the 2' mark on the width of the 4' wide mat. Using a right angle from one end of the mat, draw a straight line with a metallic sharpie marker or chalk bisecting the mat. Start scoring the line you drew with a utility knife. Keeping the right angle in place along the line you are cutting will ensure the cut is straight and consistently in the same line. If you start at the end of the rubber mat and get a split started, use your free hand or have someone help you to fold up the end of the rubber mat while you cut. This helps the cutting go a lot quicker.
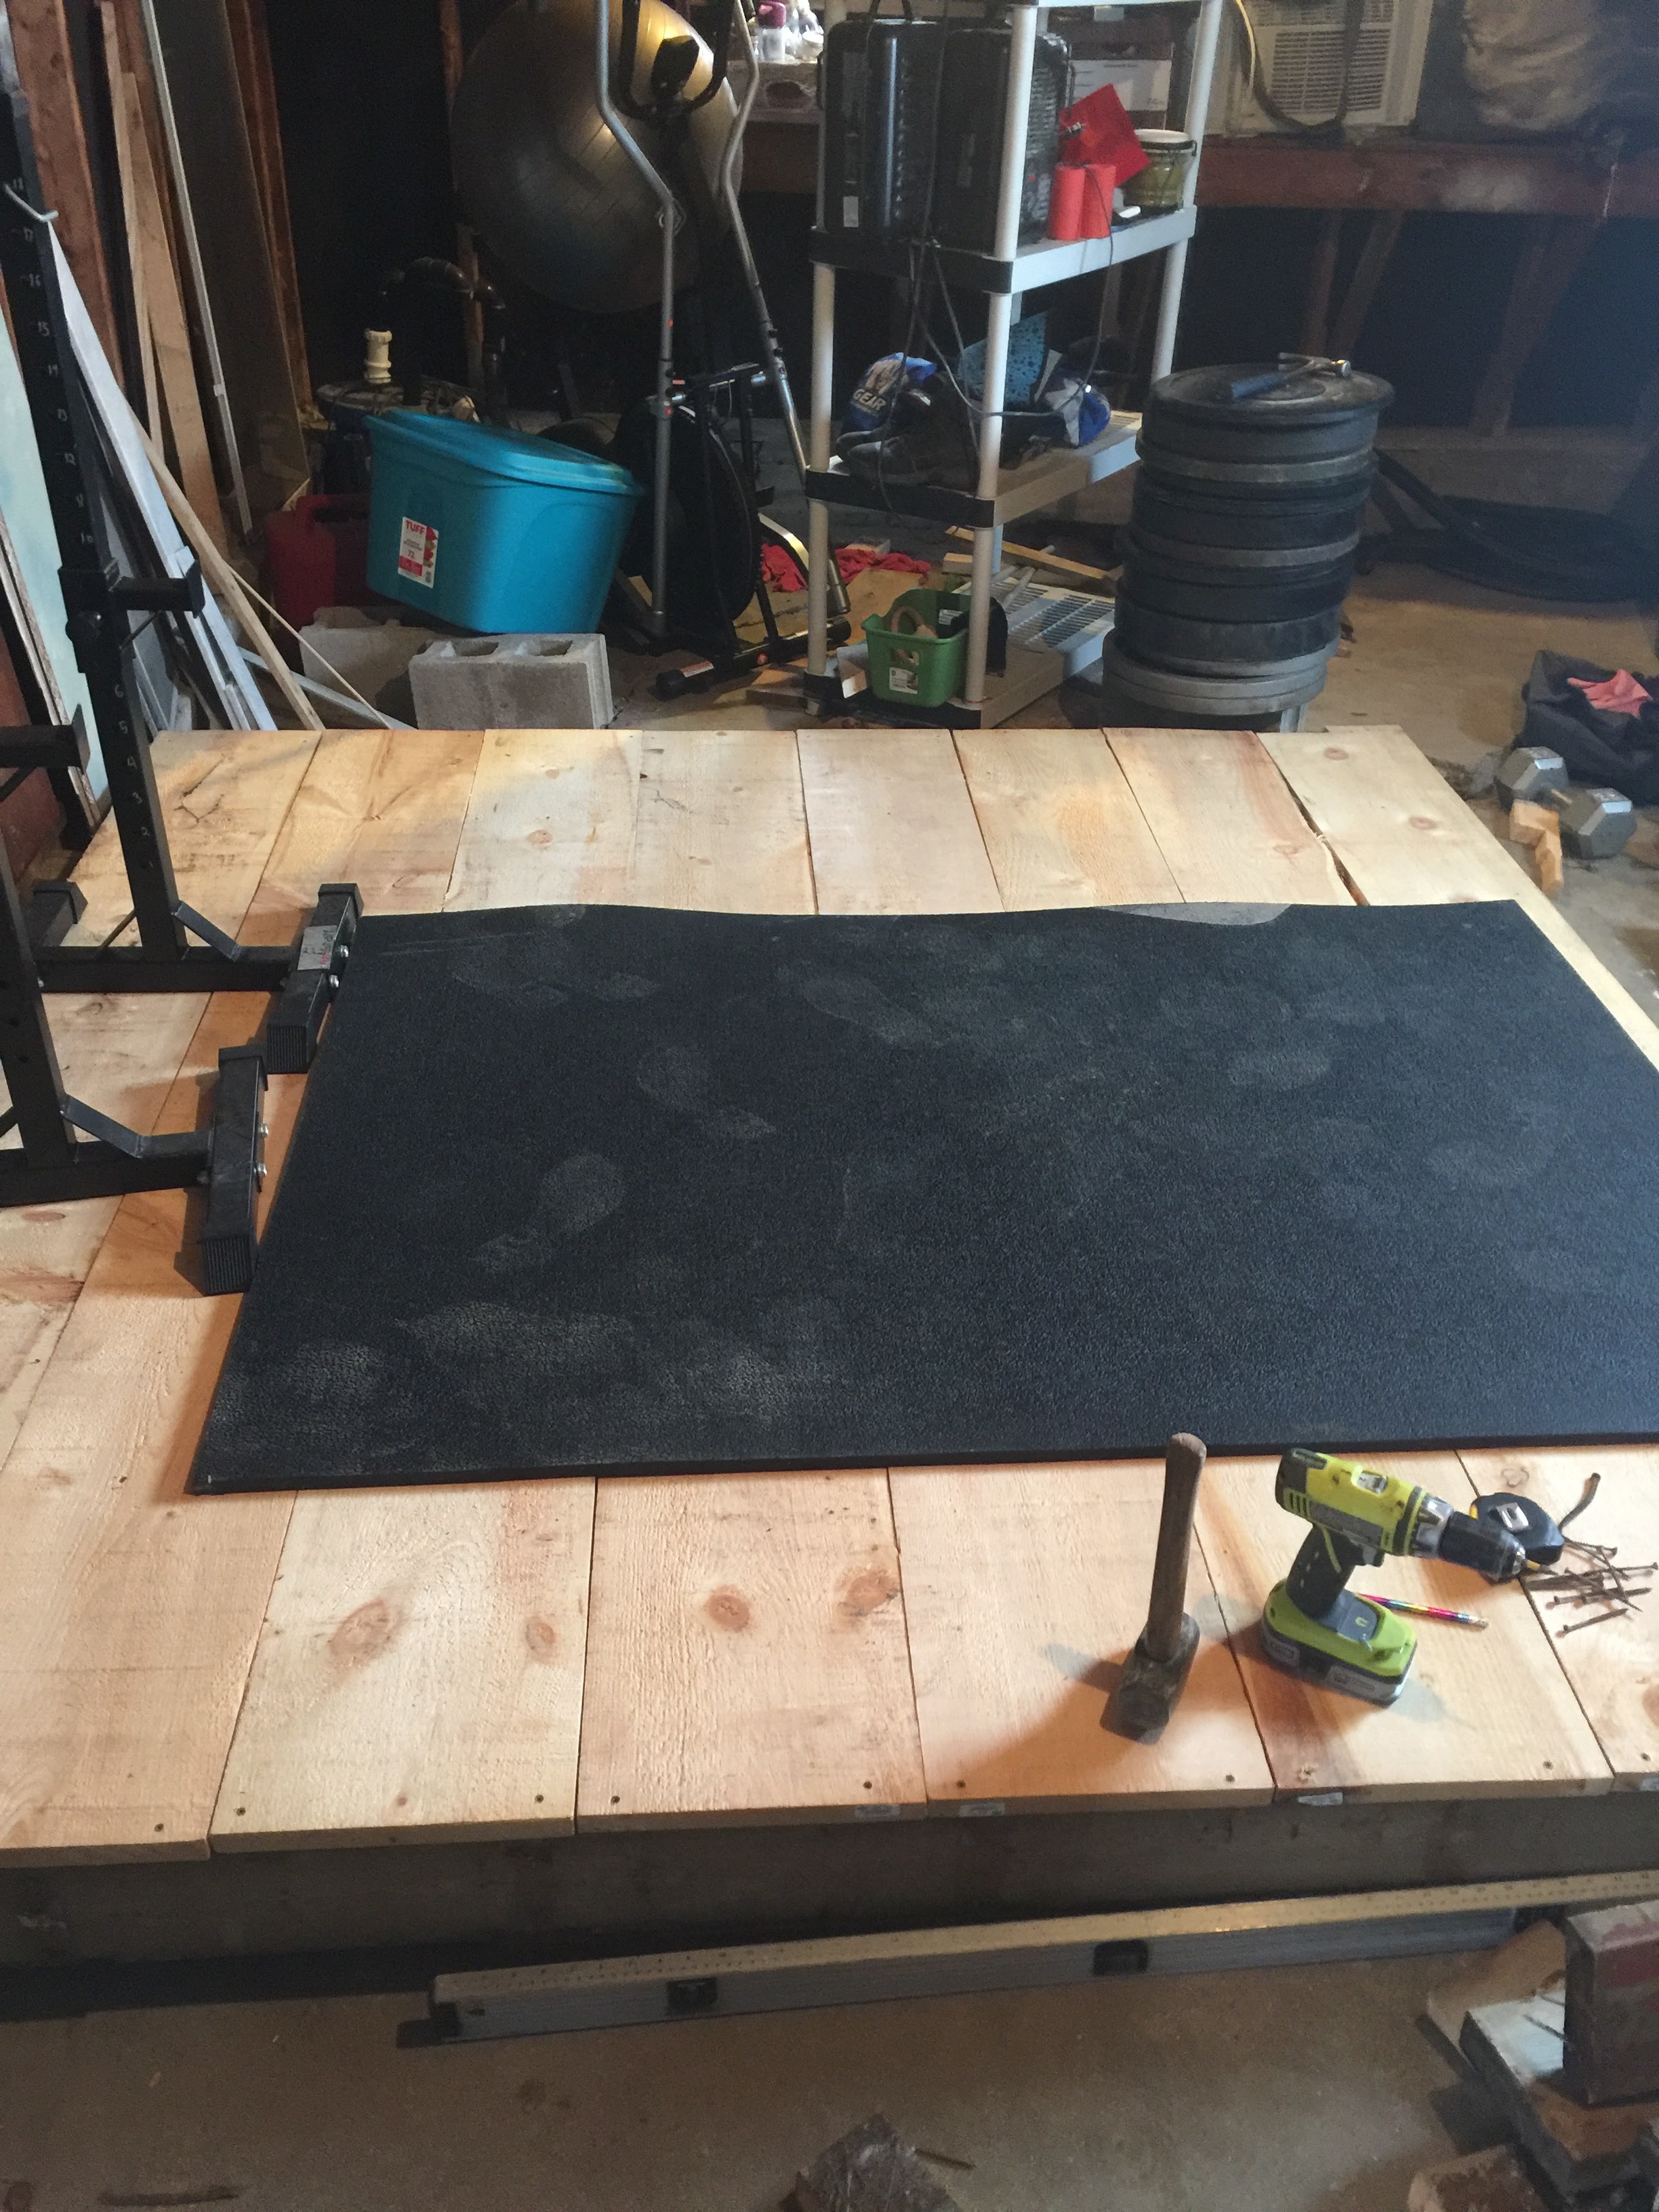
With the rubber mat cut in half, I arranged them in the direction that I wanted to lift and placed the edges I didn't cut on the inner side, so that they would sit flush with the wooden boards in the middle of the top layer.
To prepare the boards that you'll be lifting on, use a planar to cut them to 3/4" thick to match the rubber flooring, if you can do so. If not, skip this step, but know that you'll have a slight difference in the depth of the surface of your platform.

Using a belt sander, sand the top surface of each board until smooth. You want it smooth enough that you can run your hand over it without slivers, because you may want to lay down on the platform to do any sort of floor lifts like floor presses, sit ups, supermans, etc. It will also make it look nicer and help the wood to stain more evenly.
Once the boards are sanded to your liking, align them evenly in the centre of the platform with the rubber mats flush on either side. With everything arranged the way you want it, screw the boards in place. Once again walk over the surface to verify that there is no shifting or moving with any of the boards. Using 1.25" screws with washers, screw down the rubber mats on either side. The washers will prevent the screws from just ripping through the rubber mat.
We're almost there now! It's a very good idea to do several thin, even layers of wood stain and polyurethane or the 2-in-1 Polyshades to protect the wood from moisture like roof leaks, sweat, tears, and blood. Evenly apply the Polyshades to the surface and allow to dry. Repeat 1-2 times for an even coating. If doing wood stain and polyurethane separately, apply several layers of wood stain to get your desired stain and then once dry, apply polyurethane to finish. The staining process and drying takes at least a day to do. You may notice some of my photos of the nearly-finished platform don't include the sanded and stained middle boards. That's because I was too excited about lifting on my new platform and deferred finishing the boards for a couple of days so that I could get down to the real business at hand.

Now we're ready to lift.

Fortissimus
Update: Read this new article to see another build idea from fellow lifter JC.
If you like material like this, sign up for my email newsletter. it's the easiest way to stay up to date with any new articles i release. I send out weekly updates about what i'm working on and other things related to strength and strongman in Ontario.